Japanese Cuticle Care Routine at Home
- Gel nails can last 3–4 weeks, significantly longer than traditional polish which lasts 3–10 days (translated from Japanese) (https://cin-cia.com/jelnail-yarikata/).
Last updated: April 2026
Affiliate Disclosure: We may earn a commission when you purchase through our links. This does not affect our editorial independence.
Quick Answer
- Gel nails can last 3–4 weeks, significantly longer than traditional polish which lasts 3–10 days (translated from Japanese) (https://cin-cia.com/jelnail-yarikata/).
- Prep work (called 'preparation') takes about 30 minutes, while applying color takes 60–90 minutes (translated from Japanese) (https://cin-cia.com/jelnail-yarikata/).
- A self-gel nail kit can cost as little as ¥12,680 for a kit with one color (translated from Japanese) (https://cirila.jp/gelnailkit/?srsltid=AfmBOoqLqEo_XZGfd0gSM0xpk9M2PM1XQaFsONHBfhM03V2YjVSh6XS).
- Basic tools for nail care can often be substituted with household items, like kitchen paper for wipes or hot water for cuticle remover (translated from Japanese) (https://cin-cia.com/jelnail-yarikata/).
Many people are choosing to do their own gel nails at home in Japan, moving away from monthly salon visits. This trend is driven by the desire for both cost savings and the convenience of creating beautiful nail art on one's own schedule. Gel nails, which use a resin cured by UV or LED light, offer a durable and vibrant finish that lasts much longer than traditional nail polish. While salon appointments can be expensive, costing over 100,000 yen annually and taking 2–3 hours per visit (translated from Japanese) (https://watts-online.jp/blogs/column/gel-nails-turorial?srsltid=AfmBOoq5OKZtT2QK5haDbRaJQbaJMhOQlkJoY7PykNxOG1Ylh1Z4u9tk), self-gel nails provide a more affordable and flexible alternative. With the right tools and techniques, even beginners can achieve a professional, long-lasting manicure.
What is Self-Gel Nailing, and Why Do Japanese Experts Recommend It?
Self-gel nailing involves applying a synthetic resin to your nails and then curing it with an LED or UV light. This method is highly recommended by Japanese nail experts for its durability, vibrant finish, and the artistic freedom it offers. Unlike traditional nail polish that air-dries, gel nails harden through a chemical reaction initiated by light, which means a much faster and more reliable curing process.
The Benefits of Gel Nails Over Traditional Polish
Gel nails offer several distinct advantages over conventional nail polish, making them a popular choice for at-home manicures. One of the most significant benefits is the curing time. While traditional polish can take 15–30 minutes to dry per coat and requires about half a day to fully harden, gel nails cure in a mere 15–30 seconds under UV/LED light, achieving complete hardness in 30–60 seconds (translated from Japanese) (https://cin-cia.com/jelnail-yarikata/). This rapid hardening eliminates smudging and significantly speeds up the manicure process.
Durability is another major factor. Gel nails are known to last 3–4 weeks, whereas traditional polish typically chips or peels within 3–10 days (translated from Japanese) (https://cin-cia.com/jelnail-yarikata/). This extended wear means fewer touch-ups and a consistently polished look for longer. Gel nails also maintain their glossy finish, while traditional polish can lose its shine over time.
"Many people enjoy doing their own gel nails nowadays. If you find it hard to book salon appointments every month or want to enjoy beautiful nail art affordably, self-gel nails are the solution," states Nail School Cin-Cia (translated from Japanese) (https://cin-cia.com/jelnail-yarikata/). This sentiment highlights the cost-effectiveness and convenience that make self-gel nailing so appealing. Salon visits in Japan can be quite expensive, potentially costing over 100,000 yen annually, not to mention the 2–3 hours required for each appointment (translated from Japanese) (https://watts-online.jp/blogs/column/gel-nails-turorial?srsltid=AfmBOoq5OKZtT2QK5haDbRaJQbaJMhOQlkJoY7PykNxOG1Ylh1Z4u9tk). By doing your nails at home, you can save both money and time, enjoying beautiful nails without the commitment of salon schedules.
Artistic Freedom and Versatility
The nature of gel polish allows for a much wider range of artistic designs compared to traditional lacquer. Because gel polish doesn't dry until it's cured under light, you have ample time to create intricate patterns, gradients, and 3D art without worrying about the polish setting prematurely. This flexibility enables diverse designs, ensuring that even with a limited selection of colors, you can achieve a different look every month.
While the initial investment in tools for gel nails might be higher than for traditional polish, the long-term savings and creative possibilities often outweigh this. Many essential tools can even be substituted with everyday household items, making it more accessible for beginners. The ability to achieve salon-quality results at your own pace and convenience is a significant reason why Japanese experts and enthusiasts alike are embracing self-gel nailing.
What Tools Do You Need for an At-Home Japanese Gel Manicure?
To achieve a professional-looking at-home Japanese gel manicure, you will need a specific set of tools for preparation, application, and finishing. While the list might seem extensive, many items can be substituted with household alternatives, helping you manage initial costs. Starting with the essential items and gradually adding recommended tools as you become more comfortable is a practical approach.
Essential Tools for Preparation (Pre-Application Care)
The preparation phase, known as "preparation" (プレパレーション), is vital for the longevity and finish of your gel nails. Here are the tools you'll need:
- Emery Board: Used to shape your nails. Choose fine-grit products to avoid over-filing and damaging your natural nails (translated from Japanese) (https://cin-cia.com/jelnail-yarikata/).
- Wood Stick: Essential for gently pushing back cuticles. You can also wrap a small piece of cotton around the tip for a softer touch (translated from Japanese) (https://cin-cia.com/jelnail-yarikata/).
- Sponge Buffer: This tool is used to lightly buff the nail surface, creating a subtle texture that helps the gel adhere better.
- Rubbing Alcohol (Ethanol): Crucial for sanitizing your fingers and nails. It removes oils, moisture, and dust from the nail surface, ensuring optimal gel adhesion.
- Kitchen Paper (Wipe Substitute): You can use lint-free kitchen paper as a substitute for professional wipes to apply rubbing alcohol and clean the nail surface (translated from Japanese) (https://cin-cia.com/jelnail-yarikata/).
For those on a budget, some items can be easily substituted. For example, a finger bowl for soaking can be replaced by a simple washbasin, and if you don't have cuticle remover, warm water can help soften cuticles (translated from Japanese) (https://cin-cia.com/jelnail-yarikata/). This flexibility allows beginners to try out self-gel nailing without a large upfront investment.
Essential Tools for Gel Application and Curing
Once your nails are prepped, you'll move on to applying the gel polish.
- Base Gel: This is the foundational layer that ensures strong adhesion between your natural nail and the color gel. For beginners, a soft gel type is recommended over a hard gel, as soft gels are easier to handle (translated from Japanese) (https://cin-cia.com/jelnail-yarikata/).
- Color Gel: Choose your desired colors. You'll need at least one for a solid color application, or multiple if you plan intricate designs (translated from Japanese) (https://cin-cia.com/jelnail-yarikata/).
- Top Gel: This final layer seals your design, adds shine, and provides protection. Non-wipe top gels are convenient as they don't require wiping after curing, but they can generate more heat during the curing process. For beginners, a wipe-off type might be more comfortable (translated from Japanese) (https://cin-cia.com/jelnail-yarikata/).
- UV/LED Light: This is indispensable for curing the gel. Ensure the light you choose is compatible with the type of gel polish you are using. Many modern starter kits include lights that support both UV and LED gels (translated from Japanese) (https://cin-cia.com/jelnail-yarikata/).
- Gel Brush: While some bottle-type gels come with an attached brush, a separate gel brush is essential for container-type gels and for creating detailed art. A rounded brush is ideal for following the natural curve of the nail bed, while smaller brushes are suitable for intricate designs (translated from Japanese) (https://cin-cia.com/jelnail-yarikata/).
Recommended Optional Tools
These tools can enhance your experience and the quality of your manicure, but they are not strictly necessary for your first few attempts:
- Dust Brush: Useful for brushing away any dust or nail filings after shaping and buffing.
- Gel Cleaner: Used to wipe off the sticky "uncured" layer that remains after curing some top gels.
- Cotton Pads: For use with gel cleaner. Make sure they are lint-free to avoid leaving fibers on your nails.
- Cuticle Oil: Applied after the entire gel process to moisturize the cuticles and surrounding skin, promoting nail health.
In total, a basic gel nail setup typically involves about 15 items (translated from Japanese) (https://watts-online.jp/blogs/column/gel-nails-turorial?srsltid=AfmBOoq5OKZtT2QK5haDbRaJQbaJMhOQlkJoY7PykNxOG1Ylh1Z4u9tk). Many of these can be found in starter kits, which are often the most cost-effective way to begin your self-gel nail journey.
How Do You Prepare Your Nails for Japanese Gel Application?
Proper nail preparation, often referred to as "preparation" (プレパレーション), is the most crucial step for ensuring your gel manicure lasts and looks flawless. This stage focuses on creating a clean, dry, and optimally textured surface for the gel to adhere to. Skipping or rushing these steps can lead to lifting, chipping, and a shorter wear time for your gel nails. The entire preparation and care process usually takes about 30 minutes (translated from Japanese) (https://cin-cia.com/jelnail-yarikata/), but investing this time upfront will save you from future frustrations.
Step 1: Sanitize Your Hands and Nails
The very first action in any Japanese nail routine is thorough sanitization. Take a lint-free wipe or a piece of kitchen paper and dampen it with rubbing alcohol (ethanol). Carefully wipe down your fingers and especially your nail plates. The goal here is to remove any natural oils, moisture, or dust that might be present on the nail surface. These contaminants can prevent the gel from bonding correctly, leading to premature lifting. Ensure your nails are completely clean and dry before moving on. This foundational step creates the ideal canvas for your gel application.
Step 2: Shape Your Nails
Once your hands are sanitized, you can proceed to shape your nails. Use an emery board to file your nails to your desired length and shape. Japanese nail professionals emphasize using fine-grit emery boards to prevent excessive filing and potential damage to the natural nail (translated from Japanese) (https://cin-cia.com/jelnail-yarikata/). Gently file in one direction rather than a back-and-forth sawing motion, which can cause splitting and weakening of the nail plate. Whether you prefer a square, oval, almond, or round shape, ensure all nails are consistent. After shaping, use a dust brush or a clean, dry wipe to remove any nail dust that has accumulated on and around your nails. This dust, if left on the nail plate, can also interfere with gel adhesion.
Step 3: Gently Push Back Cuticles
The cuticle area is a critical focus in Japanese nail care, as a clean cuticle line is essential for a beautiful and long-lasting gel manicure. Use a cuticle pusher or a wood stick wrapped with a small piece of cotton to gently push back the cuticles. The goal is not to aggressively cut or remove the entire cuticle, but rather to push back the eponychium (the living skin at the base of the nail) and remove any non-living tissue (pterygium) that might be stuck to the nail plate. This step creates a larger, cleaner nail surface for the gel application, preventing the gel from lifting at the base.
If your cuticles are particularly dry or stubborn, you can soften them first. While professional cuticle remover products are available, soaking your fingers in warm water in a finger bowl (or even a small basin) for a few minutes can be an effective alternative (translated from Japanese) (https://cin-cia.com/jelnail-yarikata/). After soaking, gently push back the softened cuticles. Be careful not to apply too much pressure or push too far, as this can damage the nail matrix and lead to ridges or infection. The goal is a neat, clean, and healthy-looking cuticle area.
Step 4: Lightly Buff the Nail Surface
After shaping and cuticle care, the next step is to lightly buff the surface of your nails. Use a sponge buffer to gently remove the natural shine from your nail plate. This creates a slightly rough texture, providing a better grip for the base gel. It is important to buff lightly; you are not trying to thin your nails, but simply to create microscopic grooves. Over-buffing can weaken your natural nails, so use a light hand and ensure you buff the entire nail surface evenly. After buffing, once again use a dust brush or a clean wipe to remove any remaining dust. Your nail plate should now appear dull and uniform, ready for the base gel application. For more details, see Japanese self-gel nail basics.
This thorough preparation ensures that your gel polish will adhere properly, preventing common issues like lifting and chipping. By taking the time to complete each of these steps carefully, you set the foundation for a beautiful and durable self-gel manicure, achieving results that rival those from a professional salon. Watts online gel nail tutorial emphasizes that with the right procedure and tips, even beginners can achieve a beautiful finish that lasts 2-3 weeks.
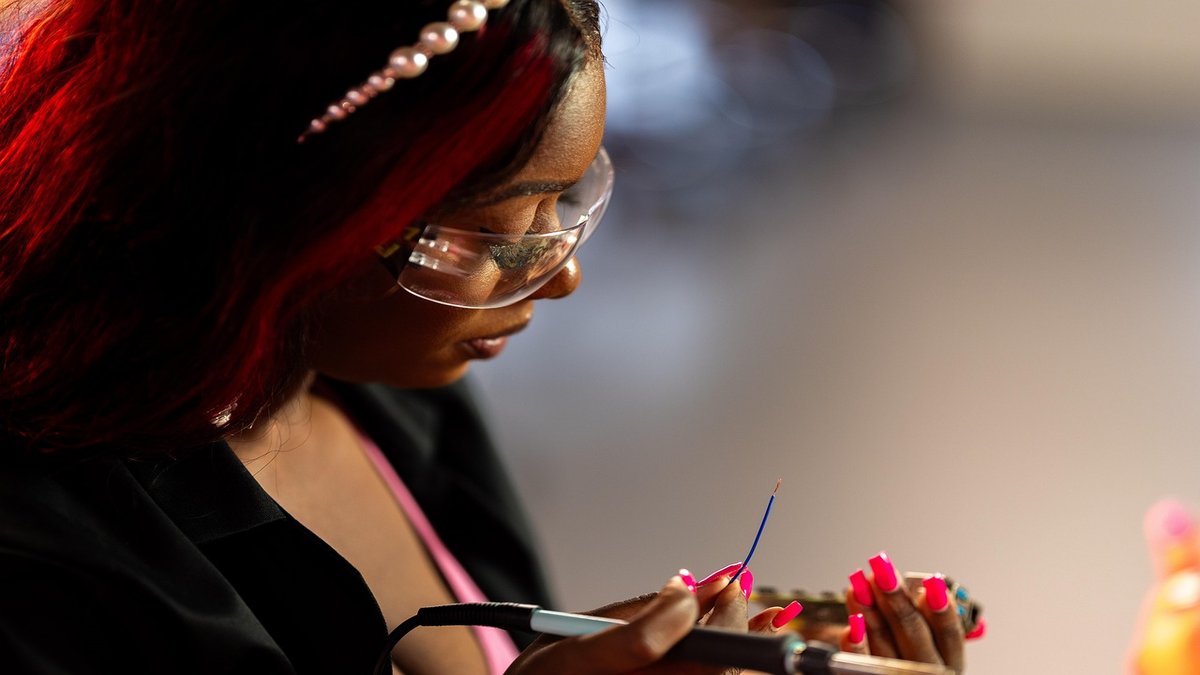
What are the Steps for a Japanese Cuticle Care Routine?
A precise cuticle care routine is a cornerstone of Japanese nail artistry, essential for both the health of your nails and the flawless application of gel polish. This routine focuses on meticulous yet gentle treatment of the eponychium (the living skin at the base of your nail) and the removal of non-living tissue that can cling to the nail plate. Proper cuticle care not only makes your nails look cleaner and more elongated but also ensures that your gel polish adheres perfectly, preventing lifting at the nail base.
Step 1: Soften the Cuticles
The first step in any effective cuticle care routine is to soften the skin around your nails. This makes the cuticles more pliable and easier to work with, reducing the risk of damage or discomfort. If you have a dedicated cuticle remover product, apply it sparingly around the base of each nail, following the product's instructions. These removers typically contain ingredients that gently dissolve dead skin cells.
If you don't have a specific cuticle remover, a simple and effective alternative is to soak your fingers in warm water. Fill a finger bowl or a small basin with comfortably warm water and immerse your fingertips for about 5-10 minutes (translated from Japanese) (https://cin-cia.com/jelnail-yarikata/). The warmth helps to soften the cuticles and the surrounding skin, preparing them for the next step. This method is often preferred for its gentleness and accessibility, making it a staple in at-home Japanese nail care.
Step 2: Gently Push Back Cuticles
Once your cuticles are softened, whether by remover or warm water, it's time to gently push them back. Use a cuticle pusher, which is a tool typically made of metal or rubber, or a wood stick. If using a wood stick, wrapping a small piece of lint-free cotton around the tip can provide a softer, more controlled push (translated from Japanese) (https://cin-cia.com/jelnail-yarikata/).
Start at the center of your cuticle line and gently push the eponychium back towards your knuckle. Work your way around the curve of the nail, being careful to apply even, light pressure. The goal is to separate any dead skin (pterygium) that might be adhering to the nail plate from the living skin. This reveals more of your natural nail surface, creating a clean, crisp line at the base of your nail. Avoid pushing too aggressively or digging into the nail, as this can cause damage to the nail matrix, which is responsible for nail growth, potentially leading to ridges or other nail irregularities. The process should be comfortable and painless.
Step 3: Remove Excess Cuticle (If Necessary)
After pushing back the cuticles, you might notice some loose, non-living skin or hangnails around the nail plate. These can be carefully trimmed using sharp, disinfected cuticle nippers or scissors. This step requires precision and a steady hand. Only trim the dead, detached skin; never cut into the living tissue, as this can lead to cuts, infections, and irritation. Many Japanese nail enthusiasts prefer to minimize cutting and focus more on pushing back, as excessive cutting can sometimes lead to thicker cuticle regrowth.
For any small, stubborn pieces of dead skin still clinging to the nail plate after pushing back, you can gently scrape them away with the edge of your cuticle pusher. This ensures the nail surface is completely clean and free of any obstructions that could interfere with gel adhesion. After this step, wipe away any remaining residue with a clean, dry wipe. The cuticle area should now look neat, tidy, and ready for the next stages of nail preparation, ensuring a long-lasting and aesthetically pleasing gel manicure.
Step 4: Clean and Dehydrate the Nail Plate
Following cuticle care, it is essential to ensure the nail plate is perfectly clean and dehydrated. Even after pushing back cuticles, there might be residual oils from your skin or the cuticle remover, as well as tiny particles of dead skin. Use a lint-free wipe saturated with rubbing alcohol (ethanol) to thoroughly clean each nail plate again. Wipe from the cuticle area towards the free edge, ensuring all traces of oil, moisture, and dust are removed. This final cleaning step is critical for maximizing the adhesion of your base gel, creating a pristine surface that will help your gel manicure last for weeks without lifting or chipping.
How Do You Apply Gel Polish for a Professional Finish?
Applying gel polish for a professional finish at home requires precision, thin layers, and proper curing. Once your nails are meticulously prepped, the application process transforms them into a beautiful, glossy canvas. The total time for gel application, including curing, typically ranges from 60 to 90 minutes (translated from Japanese) (https://cin-cia.com/jelnail-yarikata/), depending on the complexity of your design and the number of layers. Patience and attention to detail are key to achieving salon-quality results.
Step 1: Apply Base Gel
The base gel is the foundation of your gel manicure, crucial for enhancing adhesion between the color gel and your natural nail (translated from Japanese) (https://cin-cia.com/jelnail-yarikata/). Start by applying a very thin, even layer of base gel to each nail. Avoid getting the gel on your cuticles or the surrounding skin, as this can cause lifting. If you do accidentally get gel on your skin, use a wood stick to carefully clean it off before curing.
Once you have applied base gel to all nails on one hand (or one finger at a time for more control), place your hand under your UV/LED light. Cure the base gel according to the product's instructions. Curing times vary by brand and light type, but typically range from 15 to 60 seconds. Ensure the base gel is completely cured before moving to the next step. A properly cured base layer will feel slightly tacky, which helps the subsequent layers adhere better.
Step 2: Apply Color Gel
Now it’s time to apply your chosen color gel. Just like the base gel, apply the color gel in very thin, even layers. Thicker layers are prone to bubbling, wrinkling, and may not cure properly, leading to a dull finish or premature chipping. Use a gel brush (a rounded brush is good for following the cuticle line) to apply the color, starting near the cuticle and brushing towards the free edge.
After applying the first thin coat of color to all nails on one hand, cure it under your UV/LED light. Again, follow the manufacturer's recommended curing time. Most gel polishes require two to three thin coats to achieve opaque and vibrant color. Repeat the application and curing process for each subsequent color coat until you reach your desired opacity. Always remember to "cap" the free edge of your nail with each layer of gel, which means lightly brushing the gel over the very tip of your nail to seal it and prevent chipping.
Step 3: Apply Top Gel
The top gel is the final layer, providing shine, protection, and sealing your design. Apply a thin, even layer of top gel over your cured color gel. Ensure you cover the entire nail surface, including capping the free edge. This step is critical for encapsulating your design and giving your manicure a long-lasting, glossy finish. For more details, see Gel nail application guide from Cin-Cia nail school.
There are two main types of top gel: wipe-off and non-wipe. Non-wipe top gels are convenient because they cure to a completely non-tacky finish, meaning you don't need to wipe off an inhibition layer afterwards (translated from Japanese) (https://cin-cia.com/jelnail-yarikata/). However, some beginners might find that non-wipe gels can generate a bit more heat during curing, which can feel warm on the nail. If you are sensitive to heat, a wipe-off top gel might be more comfortable.
Cure the top gel under your UV/LED light for the recommended time, which is often slightly longer than the color gel, typically 60-120 seconds. If you used a wipe-off top gel, you will notice a sticky "inhibition layer" on the surface after curing. This layer needs to be removed with a lint-free wipe soaked in gel cleaner (also known as rubbing alcohol or isopropyl alcohol). Gently wipe each nail until the sticky residue is gone and your nails reveal their full shine.
Step 4: Moisturize and Hydrate
Once all the gel layers are applied and cured, and any inhibition layer is removed, the final step is to moisturize your cuticles and the surrounding skin. Apply a few drops of cuticle oil to the base of each nail and gently massage it into the cuticles and skin. This step rehydrates the skin, which can become dry during the gel application process, and helps keep your nails and cuticles healthy. Regular use of cuticle oil can also extend the life of your manicure by keeping the skin around your nails supple and preventing hangnails. This comprehensive application process, from base to top coat, ensures a durable, beautiful, and professional-looking gel manicure right from the comfort of your home. "If you practice proper preparation and application, you can achieve salon-quality results that last," advises MAINEE, a Nail Salon Owner and YouTuber (translated from Japanese) (https://i-voce.jp/feed/1861396/).
Where Can You Find Affordable Gel Nail Kits and Supplies?
Starting your self-gel nail journey doesn't have to be expensive, thanks to a wide range of affordable kits and supplies available in Japan. Whether you're looking for a comprehensive starter set or individual components, there are options to suit every budget and skill level. Many Japanese retailers, both online and physical stores, cater specifically to the growing demand for at-home gel nail solutions.
Starter Kits for Beginners
For those just starting out, a gel nail starter kit is often the most cost-effective and convenient way to acquire all the necessary tools. These kits typically include a UV/LED light, base gel, top gel, a few color gels, and essential accessories like files and buffers. Brands like Cirila offer "care-focused" gel nail kits, emphasizing gentleness on nails and skin. Their kits range from ¥12,680 for a kit with one color to ¥14,980 for a kit with three colors (translated from Japanese) (https://cirila.jp/gelnailkit/?srsltid=AfmBOoqLqEo_XZGfd0gSM0xpk9M2PM1XQaFsONHBfhM03V2YjVSh6XS). These prices make self-gel nailing a significantly more affordable option compared to regular salon visits, which can exceed 100,000 yen annually.
Online marketplaces are also excellent resources for finding a variety of starter kits. Rakuten, a major e-commerce platform in Japan, has dedicated sections for gel nail kits from various brands (https://item.rakuten.co.jp/petitprice/c/0000000267/). These platforms often feature user reviews and comparisons, helping you choose a kit that best fits your needs and budget. Look for kits that explicitly state they are beginner-friendly or include soft gels, which are easier to work with than hard gels (translated from Japanese) (https://cin-cia.com/jelnail-yarikata/).
100-Yen Shops: A Budget-Friendly Option
For the ultimate in affordability, Japanese 100-yen shops are a goldmine for gel nail supplies. Stores like Seria, CanDo, and Daiso have embraced the self-gel nail trend, offering a surprising range of products at incredibly low prices. These shops primarily stock "bottle-type" gel polishes, which come with an integrated brush, making them very easy for beginners to use, similar to applying traditional nail polish (translated from Japanese) (https://cin-cia.com/jelnail-yarikata/).
The variety of colors available at 100-yen shops is impressive. Seria, for example, offers a vast selection of 77 gel nail colors (translated from Japanese) (https://i-voce.jp/feed/1861396/). CanDo features 63 colors, including new winter shades (translated from Japanese) (https://i-voce.jp/feed/1861396/), and Daiso provides 41 gel nail colors (translated from Japanese) (https://i-voce.jp/feed/1861396/). While these polishes are often single-color bottles, they are perfect for experimenting with different shades or building a collection without a significant investment. You can also find basic tools like emery boards, buffers, and wood sticks at these stores, making it possible to assemble a basic setup for very little money.
Specialized Nail Supply Stores and Online Retailers
Beyond starter kits and 100-yen shops, dedicated nail supply stores and larger online beauty retailers offer a more extensive selection of individual gel polishes, brushes, and specialized tools. For those who want to expand their collection or upgrade specific items, these sources provide professional-grade products. Websites like Lalamaru (https://lalamaru.jp/beautycolumn/nail/selfgelnail-basic-method?srsltid=AfmBOorusCOE0OgtZ0Rm1FxkAi1erzcB9mghzJN2FHFWOywRLDh9xwUV) and other beauty media outlets in Japan often feature reviews and recommendations for various gel nail brands and products, helping you navigate the options. By exploring these different avenues, you can find everything you need to embark on your self-gel nail journey, ensuring both quality and affordability.
Frequently Asked Questions
How long does self-gel nail application take?
The entire process of applying self-gel nails, including preparation and coloring, typically takes about 90 to 120 minutes. The preparation and care steps usually take around 30 minutes, while the actual application of the base, color, and top gels, along with curing each layer, takes approximately 60 to 90 minutes (translated from Japanese) (https://cin-cia.com/jelnail-yarikata/).
What's the main difference between gel nails and regular nail polish?
The main difference lies in how they harden and their durability. Regular nail polish air-dries, taking 15–30 minutes per coat and up to half a day to fully dry. Gel nails, however, use a resin that cures in 15–30 seconds under a UV/LED light, achieving full hardness in 30–60 seconds (translated from Japanese) (https://cin-cia.com/jelnail-yarikata/). Gel nails also last 3–4 weeks, while regular polish typically lasts 3–10 days (translated from Japanese) (https://cin-cia.com/jelnail-yarikata/).
Can I use household items for gel nail preparation?
Yes, many basic tools for gel nail preparation can be substituted with common household items. For example, kitchen paper can replace professional wipes, and a regular washbasin can be used instead of a finger bowl. If you don't have cuticle remover, soaking your fingers in warm water can effectively soften cuticles (translated from Japanese) (https://cin-cia.com/jelnail-yarikata/).
Do I need a special brush for gel nail application?
For container-type gel polishes, a separate gel brush is necessary. A rounded brush is often recommended for beginners as it helps follow the natural curve of the nail bed, while finer brushes are used for intricate art (translated from Japanese) (https://cin-cia.com/jelnail-yarikata/). However, many bottle-type gel polishes, especially those found in 100-yen shops, come with an integrated brush, making them convenient for single-color application (translated from Japanese) (https://cin-cia.com/jelnail-yarikata/).
How long do self-gel nails typically last?
When applied correctly with proper preparation, self-gel nails can last for an impressive 3–4 weeks (translated from Japanese) (https://cin-cia.com/jelnail-yarikata/). This long-lasting wear is a significant advantage over traditional nail polish, which often chips or peels within 3–10 days, making gel nails a durable choice for extended wear.
Sources
- https://lalamaru.jp/beautycolumn/nail/selfgelnail-basic-method?srsltid=AfmBOorusCOE0OgtZ0Rm1FxkAi1erzcB9mghzJN2FHFWOywRLDh9xwUV
- https://cin-cia.com/jelnail-yarikata/
- https://watts-online.jp/blogs/column/gel-nails-turorial?srsltid=AfmBOoq5OKZtT2QK5haDbRaJQbaJMhOQlkJoY7PykNxOG1Ylh1Z4u9tk
- https://i-voce.jp/feed/1861396/
- https://item.rakuten.co.jp/petitprice/c/0000000267/
- https://cirila.jp/gelnailkit/?srsltid=AfmBOoqLqEo_XZGfd0gSM0xpk9M2PM1XQaFsONHBfhM03V2YjVSh6XS
- https://detail.chiebukuro.yahoo.co.jp/qa/question_detail/q13304962643
- https://unknownbeautyplace.com/nail/1830/
Related Reading
- How to Remove Japanese Gel Nails at Home
- Best Japanese Gel Nail Starter Kits
- Japanese Nail Cuticle Tools: Pushers and Nippers
- Best Japanese Nail Dotting Tools
- Best Japanese Nail Tools for Beginners
— The Nail Atlas Team