Japanese Nail Prep: Buffing vs Acid Primers
- Gel nails offer significantly longer wear, typically lasting 3-4 weeks compared to traditional nail polish which lasts 1 week or less Gel Nail Application Guide.
Last updated: April 2026
Affiliate Disclosure: We may earn a commission when you purchase through our links. This does not affect our editorial independence.
Quick Answer
- Gel nails offer significantly longer wear, typically lasting 3-4 weeks compared to traditional nail polish which lasts 1 week or less Gel Nail Application Guide.
- Proper nail preparation, known as "prepararion" in Japanese, is essential for achieving this extended wear and preventing premature lifting or peeling.
- Buffing the natural nail surface with a sponge buffer is a required step in Japanese gel nail preparation to create the necessary texture for the base gel to adhere effectively.
- While common in some Western practices for problematic nails, acid primers are not explicitly mentioned as a standard component of self-gel nail preparation in the provided Japanese sources, which emphasize mechanical preparation and gentle, nail-friendly approaches for achieving a lasting finish of 2-3 weeks, even for beginners Gel Nails Tutorial with Illustrations.
Achieving durable, salon-quality gel nails at home, particularly with Japanese techniques, hinges significantly on meticulous nail preparation. This crucial initial phase, known as "prepararion," involves several steps to ensure the natural nail is perfectly conditioned for gel application. Unlike traditional nail polish, which dries naturally and lasts only about 3 to 7 days, gel nails utilize a synthetic resin that hardens under a UV/LED light, providing a durable, glossy finish that can last 2 to 3 weeks, and often up to 3 to 4 weeks with proper care Gel Nails Tutorial with Illustrations. The core of this durability lies in how well the gel adheres to the natural nail plate. Japanese self-gel nail guides consistently highlight buffing the nail surface and thoroughly dehydrating it as key steps for strong adhesion. While acid primers are sometimes used in other regions for enhanced bonding, especially on difficult nail types, the Japanese approach, as outlined in available resources, prioritizes physical preparation and gentle formulas, aiming for a "nail and skin friendly" experience, as seen with brands like Cirila 爪も肌も傷つけない次世代ジェルネイルキット |cirila(シリラ)公式.
What is Gel Nail Preparation and Why is it Important?
Gel nail preparation, often referred to as "prepararion" (プレパレーション) in Japanese nail care, is the foundational series of steps performed on the natural nail before any gel product is applied. This comprehensive pre-treatment process is critically important because it directly impacts the adhesion, longevity, and overall quality of the gel nail application. Without proper preparation, even the highest quality gel products may lift, chip, or peel prematurely, leading to a less satisfying and shorter-lasting manicure. Japanese sources consistently emphasize that skipping or improperly executing these steps is a primary cause of gel nail failures, making them indispensable for anyone aiming for a durable, salon-like finish at home. The entire preparation and care process typically takes about 30 minutes, setting the stage for the gel application itself, which can take 60 to 90 minutes Gel Nail Application Guide.
The Purpose of Prepararion
The primary purpose of prepararion is to create an optimal surface for the gel to bond with. This involves several key objectives. First, it ensures the nail surface is clean and free from any contaminants such as oils, dirt, or residues from previous products. Natural oils produced by the nail plate can act as a barrier, preventing the gel from forming a strong bond. Second, it shapes the nail and addresses the cuticle area, which is crucial for a neat application and to prevent premature lifting around the edges. Overgrown or attached cuticles can interfere with gel adhesion at the nail base, creating gaps where moisture and air can enter, leading to lifting. Third, prepararion texturizes the nail surface. Unlike traditional polish that simply sits on top, gel needs a slightly rough surface to "grip" onto. This texture is typically achieved through gentle buffing. Lastly, it dehydrates the nail plate, removing any lingering moisture that could compromise adhesion. These combined efforts ensure that the base gel can adhere securely and evenly, forming a durable layer that resists chipping and peeling.
Consequences of Inadequate Preparation
Failing to perform adequate prepararion can lead to a host of problems that undermine the durability and appearance of gel nails. The most common issue is premature lifting or peeling. If the nail surface is not properly cleaned and dehydrated, natural oils can prevent the base gel from adhering fully, causing it to lift away from the nail plate, often starting at the edges or cuticle area. Similarly, if the cuticles are not properly pushed back and tidied, the gel may be applied onto skin rather than nail, which will inevitably lift as the skin naturally sheds. Insufficient buffing means the gel has no texture to grip, resulting in a smooth, slippery surface that the gel struggles to bond with. This can lead to the entire gel layer peeling off in one piece. Furthermore, any dust or debris left on the nail surface can get trapped under the gel, creating bumps, air pockets, and weak spots that are prone to lifting. These issues not only shorten the lifespan of the manicure but can also be frustrating for the wearer, negating the primary benefit of gel nails: their long-lasting nature.
The Durability Advantage of Gel Nails
One of the most compelling reasons for the rising popularity of self-gel nails in Japan is their superior durability compared to traditional nail polish. While conventional manicures typically last a maximum of 1 week to 10 days, often chipping or peeling within 2 to 3 days, gel nails are designed to last significantly longer. Japanese sources indicate that with proper application, including thorough prepararion, gel nails can maintain their beautiful, glossy finish for 3 to 4 weeks Gel Nail Application Guide. This extended wear time is a major advantage for individuals who find it challenging to maintain traditional polish or visit a salon frequently. The resin-based formula of gel, cured under UV/LED light, creates a hard, protective layer that is much more resistant to daily wear and tear, chipping, and fading. This longevity means less frequent application, saving time and effort in the long run. Even for beginners, following the correct preparation steps can result in a lasting finish of 2 to 3 weeks, demonstrating the profound impact of this initial stage Gel Nails Tutorial with Illustrations. The initial investment in tools and learning the process is often justified by the consistent, long-lasting results that gel nails provide, making them a favored choice for those seeking durable and vibrant nail art.
What Tools Are Needed for Nail Preparation?
Effective nail preparation for gel application requires a specific set of tools, each serving a distinct purpose in cleaning, shaping, and conditioning the natural nail. While some specialized items are highly recommended for optimal results, many Japanese self-gel nail guides also suggest common household alternatives, allowing beginners to start with a lower initial investment. The essential tools focus on creating a clean, shaped, and textured surface for the gel to adhere to. According to one detailed guide, a basic gel nail kit often includes 15 items in total, with 6 of these specifically categorized as "essential" for the preparation phase alone Gel Nails Tutorial with Illustrations. Understanding each tool's function and how to select it is key to successful self-gel nail application.
Essential Preparation Tools
The core tools for nail preparation are an emery board, a cuticle pusher or wood stick, a sponge buffer, and rubbing alcohol (ethanol) with a lint-free wipe or kitchen paper. An emery board is crucial for shaping the free edge of the nail. Japanese guides advise choosing a file with a fine grit to prevent over-filing and potential damage to the natural nail. Proper shaping not only enhances the aesthetic appeal but also helps prevent future chipping. A cuticle pusher is used to gently push back the cuticles, which are the dead skin attached to the nail plate. This step is vital to ensure that the gel adheres only to the nail and not to the skin, preventing lifting. For beginners or those looking to save costs, a wood stick with cotton can serve as an effective substitute. A sponge buffer is another indispensable tool. Its purpose is to gently abrade the surface of the nail plate, creating a slightly rough texture that the base gel can grip onto. As with emery boards, selecting a fine-grit sponge buffer is recommended to avoid excessive filing and thinning of the natural nail. Rubbing alcohol (ethanol) is used for dehydration, removing any oil, moisture, and fine dust from the nail surface. This step ensures a completely clean and dry canvas for gel application. It is applied using a lint-free wipe or, as frequently suggested in Japanese guides, a piece of kitchen paper or even a non-fluffy cotton pad, which are excellent and cost-effective alternatives Gel Nail Application Guide.
Recommended and Substitute Tools
Beyond the absolute essentials, several other tools are highly recommended for a more professional finish and easier application. A dust brush is invaluable for sweeping away the fine dust particles created during filing and buffing. Leaving dust on the nail can interfere with gel adhesion and create an uneven surface. While not strictly "essential," it significantly improves the cleanliness of the nail plate. For cuticle care, a cuticle remover can be used to soften the cuticles before pushing them back, making the process easier and more effective. If a dedicated cuticle remover is unavailable, simply soaking the fingertips in warm water (in a finger bowl or even a regular washbasin) can achieve a similar softening effect Gel Nail Application Guide. Wipes are mentioned for various uses, including removing oil and moisture, and later for wiping off uncured gel. While specialized wipes are available, Japanese sources frequently point out that kitchen paper or low-lint cotton can be used as effective substitutes, especially for wiping off excess gel from brushes or cleaning the nail surface Gel Nail Application Guide. These practical substitutions make self-gel nailing more accessible and budget-friendly, reflecting a common theme in Japanese beginner guides that aim to reduce initial costs.
Selecting the Right Tools for Beginners
For those just starting with self-gel nails, the abundance of tools can feel overwhelming. Japanese guides often recommend prioritizing the "must-have" items first and then gradually acquiring additional tools as skills develop. For instance, in the preparation phase, an emery board, a wood stick (for cuticles), a sponge buffer, and rubbing alcohol are considered fundamental. Many starter kits sold in Japan, such as those found on sites like Rakuten, bundle these essential items with gels and a curing light, offering a convenient way to begin 【楽天市場】■ジェル >ネイルキット:プチプラ. When choosing files and buffers, the emphasis is on fine grits to prevent damage, a consistent piece of advice across multiple sources. For instance, the Tokyo Shinjuku Nail School Cin-Cia suggests choosing fine-grit emery boards and sponge buffers to prevent over-filing Gel Nail Application Guide. The philosophy is to start with gentle tools and techniques to protect the natural nail, which aligns with the overall "nail and skin friendly" approach seen in some Japanese gel nail brands like Cirila 爪も肌も傷つけない次世代ジェルネイルキット |cirila(シリラ)公式. This careful selection and use of tools are integral to laying a strong foundation for long-lasting and healthy gel nails.
How Does Nail Buffing Work for Gel Adhesion?
Nail buffing is a critical step in the Japanese gel nail preparation process, specifically designed to enhance the adhesion of gel products to the natural nail plate. It works by gently abrading the smooth, glossy surface of the natural nail, transforming it into a microscopically textured landscape. This textured surface provides countless tiny anchor points that the base gel can "grip" onto, forming a much stronger and more durable bond than it would on a perfectly smooth nail. Without this mechanical etching, the gel would merely sit on top of the nail, prone to lifting and peeling prematurely. Japanese self-gel nail guides consistently list buffing with a sponge buffer as a required step, highlighting its importance in achieving the desired 3-4 week wear time for gel nails Gel Nails Tutorial with Illustrations.
The Science Behind Buffing and Adhesion
The natural nail plate is composed of keratin layers that lie relatively flat and smooth. While this smoothness gives nails their healthy appearance, it presents a challenge for substances like gel to adhere strongly. Gel formulations are designed to bond mechanically and, in some cases, chemically with the nail surface. Mechanical adhesion relies on the principle of interlocking: the liquid gel seeps into microscopic irregularities on the nail surface and, once cured, becomes solid, creating a physical bond. Buffing creates these necessary irregularities. When a fine-grit sponge buffer is gently passed over the nail, it creates minute scratches and textures. These textures increase the surface area of the nail and provide a porous structure that the base gel can penetrate. Upon curing under UV/LED light, the gel solidifies within these microscopic grooves, effectively "locking" itself onto the nail plate. This interlocking mechanism is far more robust than a mere surface bond, significantly improving the gel's resistance to lifting, chipping, and peeling, which are common issues if the nail surface remains too smooth.
Proper Buffing Technique
The technique for buffing is as important as the act itself. Japanese guides emphasize using a fine-grit sponge buffer and applying gentle pressure to avoid damaging or thinning the natural nail. The goal is not to aggressively file down the nail, but rather to create a subtle texture. Over-buffing can lead to weakened nails, making them more susceptible to breakage and potentially causing discomfort or sensitivity. The process typically involves lightly buffing the entire surface of the nail plate, from the cuticle area to the free edge, ensuring an even texture. Special attention should be paid to the areas around the cuticles and sidewalls, as these are common points where lifting can begin if not properly prepared. After buffing, it is crucial to thoroughly remove all dust particles using a dust brush, followed by a wipe with rubbing alcohol. Any remaining dust can act as a barrier, preventing the gel from making direct contact with the buffed surface and compromising adhesion. The detailed steps often outline buffing as coming after shaping and cuticle care, and directly before the final dehydration step, ensuring the nail is perfectly prepped before the base gel is applied Self Gel Nail Basic Method.
Buffing vs. Chemical Primers
While buffing provides a mechanical bond, some Western nail practices also incorporate chemical primers, particularly acid primers, to further enhance adhesion. However, Japanese self-gel nail instructions predominantly focus on mechanical preparation like buffing and thorough dehydration using alcohol. The emphasis in Japanese guidance is on creating a clean, slightly textured surface through physical means, rather than relying on harsh chemical etching. This approach aligns with the "nail and skin friendly" philosophy often promoted by Japanese brands, which aim to minimize potential damage or irritation to the natural nail and surrounding skin. Buffing, when done correctly with a fine-grit buffer, is considered a gentle yet highly effective method for achieving excellent gel adhesion without resorting to stronger chemical agents. The combination of proper buffing, meticulous cleaning, and dehydration is consistently presented as sufficient for achieving the long-lasting results expected from Japanese gel nails, making it a cornerstone of their preparation methodology.
Are Acid Primers Used in Japanese Gel Nail Prep?
Based on the provided Japanese self-gel nail guides and product information, acid primers are not explicitly mentioned or recommended as a standard step in nail preparation. Japanese sources primarily emphasize mechanical preparation, such as buffing the nail surface, alongside thorough dehydration with rubbing alcohol, for optimal gel adhesion. The focus tends to be on gentle yet effective techniques that prioritize the health and integrity of the natural nail and surrounding skin. For instance, brands like Cirila highlight "nail and skin friendly" formulations as a core aspect of their next-generation gel nail kits 爪も肌も傷つけない次世代ジェルネイルキット |cirila(シリラ)公式. This suggests a preference for less aggressive chemical interventions in general Japanese self-nail practices.
Emphasis on Mechanical Preparation and Dehydration
Japanese guides for self-gel nails, such as those from Lalamaru, Cin-Cia, and Watts Online, consistently detail a preparation process that revolves around physical steps. These steps include shaping the nail with an emery board, pushing back cuticles with a wood stick, and crucially, buffing the nail surface with a sponge buffer. Following these mechanical actions, the nail is thoroughly cleaned and dehydrated using rubbing alcohol (ethanol) and a lint-free wipe or kitchen paper Self Gel Nail Basic Method, Gel Nail Application Guide, Gel Nails Tutorial with Illustrations. The purpose of the buffing is to create a microscopically textured surface, allowing the base gel to physically grip the nail. The dehydration step removes natural oils and moisture, which can act as barriers to adhesion. These steps are considered sufficient for achieving the typical 3-4 week wear time expected from gel nails. The absence of acid primers in these detailed guides indicates that they are not considered a standard or necessary component of this preparation methodology within the context of self-gel nail application in Japan.
"Nail and Skin Friendly" Formulations
The philosophy behind many Japanese gel nail products and techniques often leans towards gentleness and minimizing potential damage. For example, Cirila's gel nail kits are developed with "nail and skin friendly" as a foundational principle for all their items 爪も肌も傷つけない次世代ジェルネイルキット |cirila(シリラ)公式. Acid primers, particularly those with methacrylic acid, are known for their strong chemical action that etches the nail plate to create a powerful bond. While effective, they can be harsh if not used correctly and may cause irritation to the skin or, in some cases, damage to the natural nail over time if overused or misapplied. The emphasis on gentle buffing, using fine-grit buffers to prevent over-filing, further supports the idea that Japanese self-gel nail practices favor less aggressive methods. The goal is to achieve strong adhesion through careful physical preparation and mild dehydration, rather than relying on potent chemical etching agents that might compromise the "friendly" aspect of the products.
Differences in Global Practices
It is important to note that nail preparation techniques can vary across different regions and professional settings. In some Western nail practices, acid primers or non-acid primers are commonly used, especially for clients with particularly oily nail beds or those who experience chronic lifting issues. These primers are designed to create a chemical bond or to dehydrate the nail more intensely than alcohol alone. However, the Japanese approach, as evidenced by the provided materials, suggests a confidence in the efficacy of thorough mechanical preparation and standard dehydrators for the majority of users. The focus on accessibility for beginners, with tips on using household items as substitutes (like kitchen paper for wipes), further illustrates a practical and less chemically intensive pathway to enjoying long-lasting gel nails at home. This difference highlights a varied philosophy in achieving gel nail longevity, with Japanese sources leaning towards meticulous physical groundwork and gentler product formulations.
Buffing vs. Acid Primers: Which is Better for Longevity?
For standard healthy nails, proper buffing combined with thorough dehydration is consistently presented in Japanese self-gel nail guides as sufficient for achieving the impressive 3-4 week wear time of gel nails Gel Nail Application Guide. While acid primers are a tool in some Western nail practices, typically reserved for clients with problematic lifting or oily nail beds to create a stronger chemical bond, they are not a standard part of the preparation process outlined in the provided Japanese sources. The choice between buffing and acid primers, or whether to use both, often depends on the specific needs of the nail, the desired level of adhesion, and the philosophy of the nail technician or product manufacturer. However, for the average self-gel nail enthusiast following Japanese methods, meticulous physical preparation is the cornerstone of longevity.
The Role of Buffing in Longevity
Buffing plays a crucial role in the longevity of gel nails by creating a mechanical bond. When a fine-grit sponge buffer is gently applied to the natural nail, it microscopically roughens the surface. This textured surface allows the base gel to penetrate and interlock with the nail plate as it cures, forming a strong physical adhesion. This mechanical bond is robust and, when combined with proper cleaning and dehydration, is highly effective in preventing lifting and chipping. Japanese guides stress the importance of using a fine-grit buffer to avoid over-filing, which can thin and weaken the natural nail. A correctly buffed nail provides an ideal canvas for gel application, ensuring that the gel has ample points to adhere to without compromising nail health. This method is considered safe and effective for regular use, contributing significantly to the 2-3 week (or even 3-4 week) durability that self-gel nails can achieve Gel Nails Tutorial with Illustrations.
Acid Primers and Their Mechanism
Acid primers, typically containing methacrylic acid, work differently. They are designed to chemically etch the nail plate, creating microscopic pores and altering the pH of the nail surface to promote a very strong chemical bond with the gel. This chemical etching provides an exceptionally strong adhesion, often stronger than mechanical buffing alone, and is particularly useful for individuals whose nails are naturally oily or who experience persistent lifting even with thorough mechanical preparation. The acid primer essentially dehydrates the nail to an extreme degree and creates a highly receptive surface for the gel. However, their potent chemical nature means they must be used with extreme caution. Direct contact with skin can cause irritation or burns, and overuse or improper application can potentially damage the natural nail plate over time, leading to thinning or sensitivity. This is likely why they are not featured in Japanese self-gel nail guides, which prioritize gentleness and ease of use for beginners.
Balancing Adhesion and Nail Health
The choice between buffing and acid primers often comes down to a balance between maximizing adhesion and maintaining nail health. For most healthy nails, the Japanese approach of meticulous buffing and dehydration offers an excellent balance. It provides sufficient adhesion for long-lasting wear while minimizing the risk of damage or irritation associated with stronger chemicals. "If you practice appropriate pre-treatment (preparation) and application methods, you can achieve salon-level durability," said MAINEE, a salon owner and YouTuber, emphasizing the effectiveness of proper technique over harsh chemicals (translated from Japanese) 初心者向け!【セルフジェルネイル】の基本のやり方。下準備から塗り方まで!【ネイリスト監修】.
Conversely, for individuals with specific nail challenges, such as extremely oily nail beds or severe lifting issues, a primer might offer a necessary boost in adhesion. However, without explicit guidance from Japanese sources on acid primers, users following Japanese self-gel nail methods should stick to the recommended buffing and dehydration steps. Over-buffing can thin the nail plate, making it weaker and more prone to damage, while strong acid primers can be harsh and require precise application to avoid adverse effects. The general consensus in the Japanese self-gel nail community, as reflected in the provided research, is that careful mechanical preparation provides a reliable and nail-friendly path to durable gel manicures.
What are the Steps for Effective Gel Nail Preparation?
Effective gel nail preparation, or "prepararion," involves a systematic sequence of steps designed to create the optimal canvas for gel application. Each step builds upon the last, ensuring the nail is clean, shaped, textured, and dehydrated, all contributing to the longevity and flawless finish of the gel manicure. This entire process typically takes approximately 30 minutes, a small investment of time for the 3-4 weeks of durable wear that gel nails provide Gel Nail Application Guide. Following these steps precisely, as outlined in various Japanese self-gel nail guides, is crucial for achieving salon-quality results at home.
Step 1: Hand Sanitization
The very first step in any nail service, including self-gel nail application, is thorough hand sanitization. This is essential to remove any surface bacteria, dirt, or oils from the hands and nails, creating a hygienic working environment. It prevents contaminants from being transferred to the nail plate during the subsequent preparation steps. Japanese guides advise using rubbing alcohol (ethanol) on a wipe to clean not only the nails but also the surrounding finger area Gel Nail Application Guide. This initial cleaning ensures that the nail surface is as pristine as possible before any physical manipulation begins. A clean foundation is paramount for preventing infection and ensuring optimal gel adhesion.
Step 2: Nail Shaping
Once the hands are sanitized, the next step is to shape the natural nails using an emery board. The desired nail shape (e.g., square, oval, almond) should be carefully filed. Japanese sources recommend using a fine-grit emery board to prevent over-filing and potential damage to the natural nail. Filing should be done in one direction to avoid fraying the nail edge, which can lead to peeling or breakage. Proper shaping contributes to the overall aesthetic of the manicure and can also help in preventing future chipping by removing any weak or uneven edges. This step is listed as essential in various guides, including Watts Online's comprehensive tutorial Gel Nails Tutorial with Illustrations.
Step 3: Cuticle Care
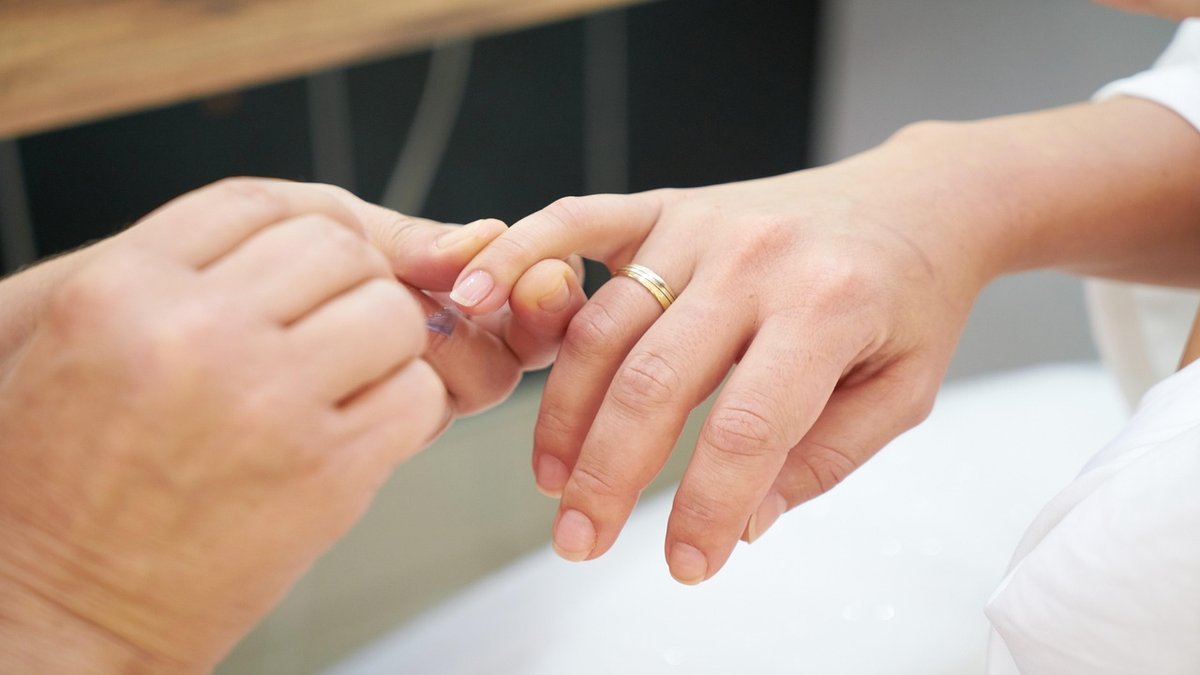
After shaping, the focus shifts to the cuticle area. Using a cuticle pusher or a wood stick, gently push back the cuticles. The goal is to separate any dead skin that may be attached to the nail plate, ensuring that the gel adheres directly to the nail and not to the skin. Applying gel onto the cuticle can lead to premature lifting as the skin naturally grows and sheds. Japanese guides often suggest using a cuticle remover to soften the cuticles beforehand, or simply soaking the fingers in warm water, to make this step easier and more gentle Gel Nail Application Guide. This meticulous attention to the cuticle line creates a clean, uniform edge for a professional-looking application.
Step 4: Nail Surface Buffing
This is a critical step for gel adhesion. Using a fine-grit sponge buffer, gently buff the entire surface of the nail plate. The purpose is not to thin the nail but to create a microscopically textured surface that the base gel can grip onto. This mechanical etching significantly enhances the gel's ability to bond securely to the nail. Japanese sources consistently emphasize using a fine-grit buffer to avoid over-filing and damaging the natural nail Gel Nail Application Guide. Buffing ensures that the gel has a porous surface to adhere to, which is key to preventing lifting and ensuring long-lasting wear.
Step 5: Dust Removal and Dehydration
After buffing, fine dust particles will be present on the nail surface. It is crucial to thoroughly remove this dust using a dust brush. Any remaining dust can create barriers between the gel and the nail, leading to poor adhesion and an uneven finish. Following dust removal, the nail plate must be dehydrated. This is done by saturating a lint-free wipe or a piece of kitchen paper with rubbing alcohol (ethanol) and wiping down each nail. This step removes any remaining oils, moisture, and fine dust, ensuring the nail surface is completely clean and dry. This final dehydration prepares the nail for optimal gel adhesion, as any lingering oil or moisture can compromise the bond. The combined effort of these steps, particularly the buffing and dehydration, is what enables gel nails to last 3-4 weeks with proper care [Gel Nails Tutorial with Illustrations](https://watts-online.jp/blogs/column/gel-nails-turorial?srsltid=AfmBOoq5OKZtT2QK5haDbRaJQbaJMhOQlkJoY7PykNxOG1Ylh1Z4u9tk].
Frequently Asked Questions
What is 'preparation' in gel nail application?
'Preparation,' or 'prepararion' in Japanese, refers to the essential pre-application steps performed on the natural nail before applying gel. It involves cleaning, shaping, pushing back cuticles, buffing the nail surface, and dehydrating the nail. This meticulous process is crucial because it ensures the gel adheres properly, preventing premature lifting or peeling, and contributing to the 3-4 week longevity of gel nails Gel Nail Application Guide.
Is buffing the natural nail always necessary for gel nails?
Yes, buffing the natural nail surface is considered a required step in Japanese gel nail preparation. It creates a slightly rough texture on the nail plate, providing microscopic anchor points for the base gel to grip onto. This mechanical bond is vital for strong adhesion and prevents the gel from lifting or peeling. Japanese guides recommend using a fine-grit sponge buffer to achieve this effect gently, without damaging the nail Gel Nails Tutorial with Illustrations.
Are acid primers commonly used in Japanese self-gel nail kits?
Based on the provided Japanese self-gel nail guides and product information, acid primers are not explicitly mentioned as a standard component of self-gel nail preparation. Japanese methods primarily focus on mechanical preparation, such as buffing, and dehydration with rubbing alcohol. This approach aligns with a preference for "nail and skin friendly" formulations and techniques, aiming to achieve durable results without relying on potentially harsh chemical etching agents 爪も肌も傷つけない次世代ジェルネイルキット |cirila(シリラ)公式.
How long do gel nails last with proper preparation?
With proper preparation and application, gel nails can last significantly longer than traditional nail polish. Japanese sources indicate that gel nails typically maintain their finish for 3 to 4 weeks. This extended durability, compared to traditional polish lasting only 3-7 days, is a key benefit of gel nails and is largely dependent on the thoroughness of the initial preparation steps Gel Nail Application Guide.
Can household items be used as substitutes for nail prep tools?
Yes, Japanese self-gel nail guides often suggest using common household items as substitutes for specialized prep tools to help beginners reduce initial costs. For example, kitchen paper or low-lint cotton can be used in place of professional lint-free wipes for applying rubbing alcohol or wiping brushes. A wood stick with cotton can substitute for a cuticle pusher, and warm water can soften cuticles if a dedicated remover isn't available Gel Nail Application Guide.
Sources
- https://lalamaru.jp/beautycolumn/nail/selfgelnail-basic-method?srsltid=AfmBOorusCOE0OgtZ0Rm1FxkAi1erzcB9mghzJN1FHFWOywRLDh9xwUV
- https://cin-cia.com/jelnail-yarikata/
- https://watts-online.jp/blogs/column/gel-nails-turorial?srsltid=AfmBOoq5OKZtT2QK5haDbRaJQbaJMhOQlkJoY7PykNxOG1Ylh1Z4u9tk
- https://i-voce.jp/feed/1861396/
- https://item.rakuten.co.jp/petitprice/c/0000000267/
- https://cirila.jp/gelnailkit/?srsltid=AfmBOoqLqEo_XZGfd0gSM0xpk9M2PM1XQaFsONHBfhM03V2YjVSh6XS
Related Reading
- Best Japanese Nail Dotting Tools
- Best Japanese Nail Tools for Beginners
- Best Japanese Gel Nail Starter Kits
- Japanese Nail Cuticle Tools: Pushers and Nippers
- Top 10 Japanese Gel Nail Brands for Professionals
— The Nail Atlas Team