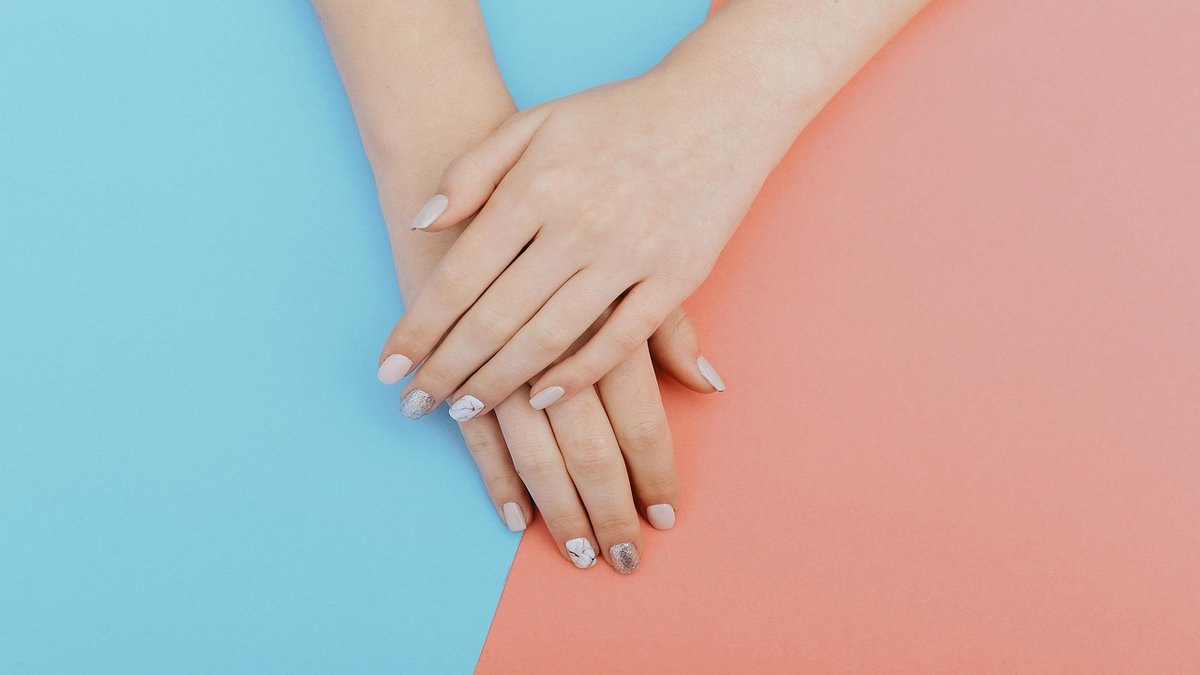
How to Fix Broken Gel Nails at Home (Japanese Method)
- Gel nails use resin cured by UV/LED light, lasting 3-4 weeks compared to polish's 1 week (translated from Japanese) Nail School Cin-Cia's Gel Nail Guide.
Last updated: April 2026
Affiliate Disclosure: We may earn a commission when you purchase through our links. This does not affect our editorial independence.
Quick Answer
- Gel nails use resin cured by UV/LED light, lasting 3-4 weeks compared to polish's 1 week (translated from Japanese) Nail School Cin-Cia's Gel Nail Guide.
- Preparation and care takes about 30 minutes, while applying gel takes 60-90 minutes (translated from Japanese) Nail School Cin-Cia's Gel Nail Guide.
- Self-gel nail kits can save over 100,000 yen annually compared to salon visits, which cost 2-3 hours per session (translated from Japanese) Watts Online Gel Nail Tutorial.
- Beginners can achieve beautiful, long-lasting results for 2-3 weeks with the right steps and tools (translated from Japanese) Watts Online Gel Nail Tutorial.
Fixing broken gel nails at home, or simply doing your own gel nails from scratch, is a growing trend in Japan, offering a cost-effective and convenient alternative to salon visits. Gel nails use a synthetic resin that hardens under UV or LED light, providing a durable and shiny finish that can last for 3 to 4 weeks, significantly longer than traditional nail polish which often chips within a week (translated from Japanese) Nail School Cin-Cia's Gel Nail Guide. While the initial setup requires more tools than regular polish, many items can be substituted with household goods, making it accessible for beginners. The entire process, including preparation and application, typically takes 90 to 120 minutes, allowing for beautiful, salon-quality nails without the hassle of monthly appointments or the annual cost of over 100,000 yen for salon services (translated from Japanese) Watts Online Gel Nail Tutorial.
What is Gel Nail, and How Does it Differ from Regular Polish?
Gel nail is a nail enhancement technique that involves applying a synthetic resin to the natural nail, which is then cured and hardened using an LED or UV light. This process creates a durable, glossy, and long-lasting finish that is distinct from traditional nail polish. The primary difference lies in the hardening method and the resulting longevity and versatility.
Curing Process and Durability
Unlike regular nail polish, which relies on air drying, gel nails harden through a chemical reaction initiated by exposure to specific light wavelengths. This light-curing process is remarkably fast; gel nails can fully harden in just 30 to 60 seconds under a UV/LED light (translated from Japanese) Nail School Cin-Cia's Gel Nail Guide. In contrast, traditional nail polish requires 15 to 30 minutes for each coat to dry and can take half a day to fully harden, often leading to smudges or damage during the drying period. This quick hardening means less waiting time and a more secure finish right after application.
The durability of gel nails is a significant advantage. While regular nail polish typically lasts for a maximum of 1 week to 10 days, and often peels within 2 to 3 days, gel nails can maintain their pristine condition for 3 to 4 weeks (translated from Japanese) Nail School Cin-Cia's Gel Nail Guide. This extended wear time makes gel nails a popular choice for those seeking a low-maintenance yet consistently polished look. The hardened resin provides a strong protective layer over the natural nail, making it more resistant to chipping, scratching, and everyday wear and tear.
Artistic Freedom and Finish
Gel nails offer a much wider range of artistic possibilities compared to traditional polish. Because each layer of gel hardens instantly, intricate designs, layering, and embedding various embellishments can be done without worrying about smudging or prolonged drying times. This allows for more elaborate and creative nail art, from subtle gradients and delicate lines to bold 3D designs. The finish of gel nails also tends to be much glossier and more vibrant, and this high-shine finish lasts throughout the entire wear period, unlike nail polish which can gradually lose its luster and become dull.
Removal Process
The removal process also differs significantly. Regular nail polish can be easily removed with a standard nail polish remover in a matter of minutes. Gel nails, however, require a specific removal process involving soaking the nails in a special gel remover for 10 to 15 minutes, often followed by gentle scraping with a wood stick. While this takes slightly longer, it is essential for safely removing the gel without damaging the natural nail. This difference highlights the stronger adhesion and durability of gel nails. Understanding these distinctions is crucial for anyone considering self-gel nails, as it helps in choosing the method best suited for their lifestyle and nail art aspirations.
What Tools Do You Need for Self-Gel Nails?
Embarking on self-gel nails requires a specific set of tools, but many can be found in common household items or purchased affordably. The entire gel nail process is typically divided into four main stages: preparation (pre-preparation), application, curing, and finishing. Each stage has its own essential tools designed to ensure a smooth application and a long-lasting, beautiful result.
Essential Tools for Each Stage
A comprehensive set of tools for self-gel nails totals about 15 basic items (translated from Japanese) Watts Online Gel Nail Tutorial. You can prioritize acquiring the "must-have" items first and then gradually add "recommended" tools as you become more comfortable.
Preparation (Pre-Preparation) Tools:
- Emery Board: Essential for shaping your nails. Opt for fine-grit products to prevent over-filing and potential damage to the natural nail.
- Wood Stick: Used for gently pushing back cuticles. A cotton-wrapped wood stick can also serve as a substitute for a cuticle pusher.
- Sponge Buffer: Critical for lightly filing the nail surface to create a texture that helps the gel adhere better. Choose a fine-grit buffer to avoid excessive thinning of the nail plate.
- Rubbing Alcohol (Ethanol): Used with a wipe to remove oil, moisture, and dust from the nail surface, ensuring a clean base for gel application.
- Kitchen Paper or Lint-Free Wipes: Perfect for soaking with rubbing alcohol for nail surface cleaning, and also useful for wiping excess gel from brushes. Wipes are preferred for their low lint.
- Dust Brush (Recommended): Helps to efficiently remove any dust or debris created during filing, ensuring a clean application surface.
- Cuticle Remover (Optional): Can be used to soften cuticles, making them easier to push back. Warm water can be used as a substitute.
- Finger Bowl (Optional): For soaking fingers in warm water if not using cuticle remover. A regular basin can be used instead.
Application (Coloring) Tools:
- Base Gel: This is the foundation of your gel manicure. It enhances the adhesion between the color gel and your natural nail. For beginners, a soft gel type is recommended due to its easier handling compared to the thicker hard gels (translated from Japanese) Nail School Cin-Cia's Gel Nail Guide.
- Color Gel: Choose your desired colors. You'll need at least one for a single-color application, or multiple for nail art. Gels come in bottle types (with an attached brush, often found in 100-yen stores and beginner-friendly) and container types (requiring a separate brush, better for detailed art) (translated from Japanese) Nail School Cin-Cia's Gel Nail Guide.
- Top Gel: The final layer, providing shine, protection, and sealing the design. Non-wipe types are convenient as they don't require wiping after curing, but they can generate more heat. Beginners might prefer wipe-off types to avoid this heat sensation (translated from Japanese) Nail School Cin-Cia's Gel Nail Guide.
- Gel Brushes: Essential for applying container-type gels and for intricate art. A round brush is ideal for following the curve of the nail base, while a fine art brush is needed for detailed designs. Different brush sizes (e.g., square for large nails, short round for small nails) can be used (translated from Japanese) Nail School Cin-Cia's Gel Nail Guide.
Curing Tools:
- LED/UV Light: This is indispensable for hardening the gel. Modern lights often support both UV and LED gels, making them versatile for beginners (translated from Japanese) Nail School Cin-Cia's Gel Nail Guide. Ensure the light you choose is compatible with the type of gel you are using.
Finishing Tools:
- Gel Cleanser (Condition-dependent): Used to wipe off the uncured gel layer (known as the inhibition layer) after the top coat has been cured, if you are using a wipe-off top gel.
- Cotton Pads (Condition-dependent): Used with gel cleanser for wiping. Ensure they are lint-free to avoid leaving fibers on the nail.
- Cuticle Oil (Recommended): For moisturizing the cuticles and surrounding skin after the gel application is complete, promoting healthy nails and skin.
Cost-Saving Tips and Kits
To reduce initial costs, many items can be substituted with household goods, such as kitchen paper for wipes or a regular basin for a finger bowl. For those looking for a complete starter set, various gel nail kits are available. For instance, the Cirila gel nail kit, which focuses on being gentle on nails and skin, offers different packages: a kit with 1 color for 12,680 yen, a kit with 2 colors for 13,980 yen, and a kit with 3 colors for 14,980 yen (translated from Japanese) Cirila Gel Nail Kit Official. These kits often bundle essential items, making it easier for beginners to get started.
How to Prepare Your Nails (Prep/Care, 30 Minutes)
Proper nail preparation, also known as "pre-preparation" or "prep," is the most crucial step for ensuring your gel nails adhere well, last long, and look professional. This stage typically takes about 30 minutes (translated from Japanese) Nail School Cin-Cia's Gel Nail Guide and directly impacts the longevity and finish of your manicure. Skipping or rushing these steps can lead to lifting, chipping, or a less polished appearance.
Step 1: Sanitize Your Hands and Nails
The very first action in any nail service, whether in a salon or at home, is thorough sanitation. This helps to prevent infections and ensures a clean working surface.
- Process: Dispense an appropriate amount of rubbing alcohol (ethanol) onto a lint-free wipe or cotton pad. Carefully wipe down your fingers and the entire nail surface of each hand. The goal is to remove any surface oils, moisture, or dust that might be present. A clean nail surface is ideal for gel adhesion.
- Why it's important: Oils and moisture are common culprits behind gel lifting. Even natural oils from your skin can create a barrier that prevents the base gel from properly bonding with your nail plate. Dust, too, can get trapped under the gel, leading to bumps or unevenness.
Step 2: Shape Your Nails
After sanitation, shaping your nails creates the desired aesthetic and also helps in preventing snags or breaks.
- Process: Use an emery board to gently file your nails into your preferred shape (e.g., square, oval, almond). Always file in one direction rather than sawing back and forth, as this can cause splitting. Pay attention to the edges to ensure they are smooth and free of burrs.
- Product Choice: When selecting an emery board, opt for products with a finer grit. Fine-grit files are less aggressive and help prevent over-filing, which can thin and weaken your natural nails. Over-filing can also create micro-tears in the nail plate, making it more prone to damage.
Step 3: Care for Your Cuticles
Proper cuticle care is vital for a neat finish and to prevent gel from lifting at the nail base.
- Process: If using cuticle remover, apply a small amount to your cuticles and let it sit for a minute to soften the skin. Alternatively, soak your fingertips in warm water in a finger bowl or small basin for a few minutes. Once softened, use a cuticle pusher or a wood stick wrapped with cotton to gently push back the cuticles. Be careful not to apply too much pressure or push too aggressively, as this can damage the delicate cuticle area. After pushing back, you can carefully trim any excess dead skin (hangnails) with cuticle nippers, but avoid cutting the live cuticle, as it protects against infection.
- Why it's important: Cuticles that are not properly pushed back can trap gel, leading to an uneven application and early lifting. Gel should only be applied to the nail plate itself, not the surrounding skin or cuticles. This step creates a clean canvas for the gel application, ensuring a crisp line at the base of your nail.
Step 4: Lightly Buff the Nail Surface
Buffing creates a slightly rough surface that allows the gel to adhere more strongly.
- Process: Using a sponge buffer, gently buff the entire surface of each nail. The goal is not to thin the nail, but to remove the natural shine and create a microscopic texture. Be thorough but gentle.
- Why it's important: Natural nails have a smooth, sometimes oily surface that gel struggles to bond with. Buffing removes this shine and creates tiny grooves that the base gel can grip onto, significantly improving adhesion. After buffing, use a dust brush to remove any fine dust particles, then re-sanitize with rubbing alcohol if needed to ensure the nail is completely clean and dry before applying gel. This meticulous preparation is what allows for salon-quality longevity, as emphasized by MAINEE, a salon owner and YouTuber who states, "If you practice proper pre-preparation and application, you can achieve salon-quality longevity" (translated from Japanese) Nailist-supervised Self-Gel Nail Guide.
How to Apply Gel Polish (Coloring, 60-90 Minutes)
Applying gel polish correctly is a methodical process that, when done carefully, yields a beautiful and long-lasting manicure. This stage, often referred to as "coloring," typically takes 60 to 90 minutes (translated from Japanese) Nail School Cin-Cia's Gel Nail Guide. The key is to work in thin, even layers, curing each one thoroughly under your UV/LED light.
Step 1: Apply Base Gel
The base gel acts as an adhesive layer, creating a strong bond between your natural nail and the subsequent color layers. This is a critical step for preventing lifting and ensuring durability.
- Process: Apply a very thin, even layer of base gel to each nail. Start from the cuticle area, leaving a tiny gap (about 1mm) from the skin, and brush towards the free edge. Make sure to "cap" the free edge by lightly brushing the gel over the tip of the nail. This seals the edge and helps prevent chipping. Avoid applying too much gel, as thick layers can lead to uneven curing or lifting. If you get any gel on your skin, immediately wipe it off with a wood stick before curing.
- Curing: Place your hand under the UV/LED light and cure according to the manufacturer's instructions for your specific base gel, typically 30-60 seconds. Ensure full curing for optimal adhesion.
Step 2: Apply Color Gel
Color gel is applied in thin coats to achieve opaque and vibrant results. Multiple thin coats are always better than one thick coat.
- Process: After curing the base gel, apply your first thin layer of color gel. Again, start near the cuticle, leaving a small gap, and brush towards the free edge, capping the tip. The first coat might appear somewhat transparent or streaky, which is normal. The goal of the first coat is even coverage, not full opacity.
- Curing: Cure the first color coat under the UV/LED light for the recommended time (usually 30-60 seconds).
- Second Coat (and subsequent coats): Apply a second thin layer of color gel. This coat will build up the opacity and vibrancy. If necessary, apply a third thin coat, curing each layer completely. Always ensure the gel does not touch the surrounding skin, using a wood stick to clean up any mistakes before curing.
- Brush Selection: For applying color gel, a round brush is excellent for navigating the natural curve near the cuticle, providing a clean, precise application (translated from Japanese) Nail School Cin-Cia's Gel Nail Guide. For larger nails, a square brush might be more efficient, while smaller nails benefit from a short round brush. If you're doing intricate nail art, a fine art brush is indispensable. After each color application and before switching colors, wipe your brush thoroughly on a piece of kitchen paper to remove excess gel (translated from Japanese) Nail School Cin-Cia's Gel Nail Guide. This prevents color mixing and keeps your brushes clean.
Step 3: Apply Top Gel
The top gel is the final protective layer, providing shine, durability, and sealing your design.
- Process: Apply a slightly thicker, but still even, layer of top gel over your cured color coats. Ensure full coverage from cuticle to free edge, and remember to cap the free edge to seal everything in. This layer is crucial for the longevity and glossy finish of your manicure.
- Curing: Cure the top gel under the UV/LED light for the recommended time, which might be slightly longer than the color gel (e.g., 60-120 seconds), depending on the product.
- Wiping (if applicable): If you are using a "wipe-off" type of top gel, there will be a sticky "inhibition layer" on the surface after curing. This layer needs to be removed. Soak a lint-free wipe or cotton pad with gel cleanser (or rubbing alcohol) and gently wipe each nail until the stickiness is gone and a high shine appears. If you are using a "non-wipe" top gel, this step is not necessary. However, beginners might find wipe-off types more forgiving as non-wipe types can sometimes feel hotter during curing (translated from Japanese) Nail School Cin-Cia's Gel Nail Guide.
Step 4: Moisturize
The final step is to nourish your cuticles and surrounding skin.
- Process: After all gel layers are cured and wiped (if necessary), apply a small amount of cuticle oil to the skin around each nail. Gently massage it in.
- Why it's important: The curing process and use of dehydrating agents can dry out the skin around your nails. Cuticle oil helps to rehydrate, keeping your cuticles healthy and preventing them from cracking or peeling, which contributes to the overall neatness and health of your manicure.
By following these application steps carefully, you can achieve a professional-looking gel manicure at home, enjoying the benefits of long-lasting and beautiful nails. For more details, see Watts Online Gel Nail Tutorial.
How Can You Prevent Gel Nails from Peeling?
Preventing gel nails from peeling is paramount for achieving a long-lasting and satisfying manicure. Peeling is often the result of improper application techniques or insufficient nail preparation. By focusing on key steps, you can significantly enhance the adhesion and durability of your self-gel nails.
Thorough Nail Preparation
The foundation of a long-lasting gel manicure lies in meticulous preparation, also known as "pre-preparation." This stage is critical for creating an optimal surface for the gel to adhere to.
- Complete Cleaning: Begin by thoroughly sanitizing your hands and nails with rubbing alcohol. This step removes all traces of natural oils, lotions, and moisture from the nail plate. Even a microscopic amount of oil can act as a barrier, preventing the base gel from bonding effectively.
- Cuticle Management: Gently push back and, if necessary, carefully trim any non-living cuticle tissue. Gel should never be applied to the cuticle or surrounding skin. When gel touches the skin, it creates a weak point where moisture can seep in, leading to lifting and peeling. A clean, gel-free margin around the nail is essential.
- Light Buffing: Lightly buff the entire nail surface with a fine-grit sponge buffer. This removes the natural shine and creates a slightly textured surface, giving the base gel something to "grip" onto. However, avoid over-buffing, as this can thin and weaken the natural nail. After buffing, ensure all dust is removed with a dust brush and re-sanitize if needed to guarantee a perfectly clean, dry surface.
Correct Application Technique
The way you apply the gel layers also plays a significant role in preventing peeling.
- Thin Layers: Always apply gel in thin, even layers. Thick layers of gel are more prone to lifting and may not cure properly, leaving sticky, uncured spots beneath the surface. Multiple thin coats are far more durable and aesthetically pleasing than one thick coat. Each layer, from base to color to top, should be applied thinly and evenly.
- Capping the Free Edge: "Capping" the free edge of the nail is a simple yet effective technique to seal the tip of the nail. After applying each layer of gel (base, color, and top), lightly brush the gel over the very edge of the nail tip. This creates a protective seal that prevents moisture and debris from getting under the gel, which is a common cause of chipping and peeling at the nail tip.
- Avoid Skin Contact: As mentioned in cuticle care, ensure that no gel touches the skin around the nail. If any gel accidentally gets on the skin, immediately clean it off with a wood stick before curing. Cured gel on the skin will lift as the skin flexes and grows, often taking the entire gel layer with it.
Proper Curing
Inadequate curing is a major cause of gel peeling and can also lead to nail damage or allergies.
- Follow Instructions: Always cure each layer of gel under your UV/LED light for the time specified by the gel manufacturer. Curing times can vary between brands and types of gel.
- Compatible Light: Ensure your UV/LED light is compatible with the type of gel you are using. Most modern lights are dual-spectrum, supporting both UV and LED gels, but it's important to check. An underpowered or incompatible light will not fully cure the gel, leaving it soft, prone to lifting, and potentially sticky.
- Even Exposure: Position your hand correctly under the light to ensure all nails receive even exposure. Some lamps have specific finger guides to help with this.
By diligently following these practices, from thorough preparation to precise application and complete curing, you can significantly reduce the likelihood of your gel nails peeling, allowing you to enjoy your beautiful, long-lasting manicure for weeks.
What are the Benefits and Drawbacks of Self-Gel Nails?
Choosing to do gel nails at home comes with a unique set of advantages and disadvantages. Many people are realizing that "gel nails are not just for salons" and are increasingly enjoying them at home (translated from Japanese) Nail School Cin-Cia's Gel Nail Guide. Understanding these aspects can help you decide if self-gel nails are the right choice for your lifestyle and preferences.
Benefits of Self-Gel Nails
Self-gel nails offer several compelling advantages, making them an attractive option for many.
Cost Savings
One of the most significant benefits is the substantial cost savings compared to regular salon visits. Going to a nail salon can easily cost over 100,000 yen annually (translated from Japanese) Watts Online Gel Nail Tutorial. While there's an initial investment in tools and gels for a home setup, this cost is quickly recouped. After the initial purchase, the ongoing expense for new colors or replacement gels is minimal, making it a much more economical choice in the long run.
Convenience and Flexibility
Salon appointments typically require 2-3 hours per session (translated from Japanese) Watts Online Gel Nail Tutorial, not including travel time. Self-gel nails solve the problem of "it's hard to make monthly salon appointments" (translated from Japanese) Nail School Cin-Cia's Gel Nail Guide. You can do your nails at any time that suits your schedule, whether it's late at night, on a weekend, or whenever you have a spare hour or two. This flexibility is invaluable for busy individuals.
Creative Freedom and Variety
Gel nails offer a wide range of artistic possibilities (translated from Japanese) Nail School Cin-Cia's Gel Nail Guide. With gel, you can experiment with various colors, glitters, and embellishments, creating unique designs that reflect your personal style. Since you're not paying per design or color change, you have the freedom to switch up your look as often as you like without extra cost. This allows for "enjoying different nails every month even with few colors, depending on your ideas" (translated from Japanese) Nail School Cin-Cia's Gel Nail Guide.
Durability and Shine
Gel nails are significantly more durable than traditional nail polish, lasting 2-3 weeks, or even 3-4 weeks with proper application (translated from Japanese) Nail School Cin-Cia's Gel Nail Guide. They are less prone to chipping, smudging, or dulling, maintaining a glossy, fresh-from-the-salon look for an extended period. This means less time spent on touch-ups and more time enjoying flawless nails.
Drawbacks of Self-Gel Nails
Despite the many benefits, self-gel nails also come with certain drawbacks that are important to consider.
Initial Investment
The upfront cost for a complete gel nail kit can be higher than simply buying a few bottles of nail polish. A basic set of 15 essential items is needed (translated from Japanese) Watts Online Gel Nail Tutorial, including a UV/LED lamp, various gels (base, color, top), and prep tools. While this investment pays off over time, it can be a barrier for some.
Time Commitment
While flexible, the actual process of applying and removing gel nails takes time. Application alone can take 60-90 minutes (translated from Japanese) Nail School Cin-Cia's Gel Nail Guide, and preparation adds another 30 minutes. Removal also requires 10-15 minutes of soaking (translated from Japanese) Watts Online Gel Nail Tutorial. This cumulative time can be a drawback for those with very limited free time or who prefer instant results.
Learning Curve
Achieving salon-quality results at home requires practice and patience. Beginners might initially struggle with techniques like thin layering, cuticle care, and preventing gel from touching the skin. "It might seem difficult to do self-gel nails... but with the correct procedures and tips, even beginners can achieve beautiful results that last 2-3 weeks" (translated from Japanese) Watts Online Gel Nail Tutorial. However, there is a learning curve to overcome.
Potential for Nail Damage
If not done correctly, both the application and removal of gel nails can potentially damage the natural nails. Over-filing, aggressive scraping during removal, or improper curing can weaken the nail plate. It's crucial to follow instructions carefully and use gentle techniques.
Ultimately, self-gel nails are ideal for those who are willing to invest time in learning the process, enjoy creative expression, and want to save money in the long run. For others, the convenience of a salon might still outweigh the benefits of DIY. For more details, see Lalamaru Self-Gel Nail Basic Method.
Where Can You Find Affordable Gel Nail Supplies in Japan?
Finding affordable gel nail supplies in Japan is easier than ever, thanks to the widespread availability of products at various price points. From budget-friendly 100-yen shops to online retailers, there are numerous options for beginners and experienced enthusiasts alike.
100-Yen Shops: A Great Starting Point
For those just beginning their self-gel nail journey, 100-yen shops like Seria, CanDo, and Daiso are excellent places to start. These stores have significantly expanded their beauty sections to include a wide range of gel nail items.
- Bottle-Type Gels: These shops primarily stock "bottle-type" gels, which come with an attached brush (translated from Japanese) Nail School Cin-Cia's Gel Nail Guide. This design makes them very beginner-friendly, as they can be applied much like traditional nail polish, eliminating the need to purchase separate brushes initially.
- Color Variety: Despite the low price, 100-yen shops offer a surprising array of colors. For instance, Seria boasts 77 gel nail colors as of Fall/Winter 2022 (translated from Japanese) Seria Gel Nail Colors, CanDo features 63 gel nail colors, including new Winter 2023 shades (translated from Japanese) CanDo Gel Nail Colors, and Daiso offers 41 gel nail colors, including new 2023 shades (translated from Japanese) Daiso Gel Nail Colors. This allows for extensive experimentation without breaking the bank.
- Other Essentials: Beyond color gels, you can often find basic necessities like base gels, top gels, small UV/LED lamps, emery boards, buffers, and wood sticks at these stores. While the quality might not always match professional-grade products, they are perfectly adequate for learning the ropes and practicing techniques.
Online Retailers and Specialty Stores
As you advance in your self-gel nail skills or wish for a broader selection and higher quality, online retailers and specialty nail stores become invaluable resources.
- Online Marketplaces: Websites like Rakuten (e.g., プチプラ on Rakuten Petitprice Nail Kits) and Amazon Japan offer a vast selection of gel nail kits, individual gels, and tools from various brands. These platforms often have sales and bundles, making it possible to find good deals. You can also read reviews from other Japanese users to gauge product quality and suitability.
- Specialty Nail Brands: Brands that focus specifically on nail products, often found online or in larger beauty supply stores, provide a wider range of "container-type" gels. These gels are typically used with separate brushes and are preferred for more intricate nail art due to their consistency and pigmentation (translated from Japanese) Nail School Cin-Cia's Gel Nail Guide. Investing in good quality brushes from these brands is often recommended for better application and more precise designs.
- Starter Kits: For those looking for a complete set, many brands offer beginner-friendly gel nail kits. For example, the Cirila gel nail kit, known for being gentle on nails and skin, comes in various configurations, with a kit including 3 colors priced at 14,980 yen (translated from Japanese) Cirila Gel Nail Kit Official. These kits often include an LED/UV lamp, base gel, top gel, and a few color gels, providing everything needed to get started. According to a Yahoo! Chiebukuro user, "I want to start self-gel nails. I want to buy a starter set with the best cost performance" (translated from Japanese) Yahoo! Chiebukuro - Gel Nail Kits, highlighting the demand for affordable yet comprehensive options.
When shopping, consider the compatibility of gels and lamps, as not all products are interchangeable. While 100-yen shops are excellent for initial experimentation, investing in higher-quality items from specialty brands as you gain experience can significantly improve your results and the longevity of your manicures.
Frequently Asked Questions
How long do self-gel nails typically last?
Self-gel nails, when applied correctly with proper preparation, typically last for 2 to 3 weeks. With meticulous care and technique, some users can even achieve a duration of 3 to 4 weeks (translated from Japanese) Nail School Cin-Cia's Gel Nail Guide. This is significantly longer than traditional nail polish, which often peels within a week.
Can I use regular nail polish tools for gel nails?
Some basic tools like emery boards and cuticle pushers can be used for both regular nail polish and gel nails. However, you cannot use regular nail polish itself as a substitute for gel polish, nor can you use regular polish top coats or base coats with gel. Gel nails require specific gel products and a UV/LED light for curing (translated from Japanese) Watts Online Gel Nail Tutorial.
Is it difficult for beginners to do self-gel nails?
While self-gel nails require more steps and tools than regular polish, it is not inherently difficult for beginners. With the right instructions and practice, even those who consider themselves "clumsy" can achieve beautiful results that last 2-3 weeks (translated from Japanese) Watts Online Gel Nail Tutorial. Starting with beginner-friendly bottle-type gels and a basic kit can make the learning process smoother.
What is the most important step for long-lasting gel nails?
The most important step for long-lasting gel nails is thorough nail preparation, also known as "pre-preparation." This involves sanitizing the nail, shaping it, pushing back cuticles, and lightly buffing the surface to remove oils and create adhesion. If you practice proper pre-preparation and application, you can achieve salon-quality longevity, according to salon owner MAINEE (translated from Japanese) Nailist-supervised Self-Gel Nail Guide.
Where can I buy affordable gel nail supplies in Japan?
Affordable gel nail supplies can be found at 100-yen shops like Seria, CanDo, and Daiso, which offer a wide range of gel colors and basic tools. For example, Seria has 77 gel nail colors (translated from Japanese) Seria Gel Nail Colors. Online retailers and specialty nail stores also provide a broader selection, including starter kits and professional-grade products.
Sources
- ララマル(旧セブンショップ)【公式】: https://lalamaru.jp/beautycolumn/nail/selfgelnail-basic-method?srsltid=AfmBOorusCOE0OgtZ0Rm1FxkAi1erzcB9mghzJN2FHFWOywRLDh9xwUV
- ジェルネイルのやり方・手順と必要なものを解説【初心者セルフ向け】 東京新宿のネイルスクール|「ネイルスクール シンシア」【JNA本部認定校】: https://cin-cia.com/jelnail-yarikata/
- ジェルネイルのやり方完全版|知っておけば安心の手順とコツ・失敗時の対処法: https://watts-online.jp/blogs/column/gel-nails-turorial?srsltid=AfmBOoq5OKZtT2QK5haDbRaJQbaJMHOQlkJoY7PykNxOG1Ylh1Z4u9tk
- 初心者向け!【セルフジェルネイル】の基本のやり方。下準備から塗り方まで!【ネイリスト監修】: https://i-voce.jp/feed/1861396/
- 【楽天市場】■ジェル >ネイルキット:プチプラ: https://item.rakuten.co.jp/petitprice/c/0000000267/
- 爪も肌も傷つけない次世代ジェルネイルキット |cirila(シリラ)公式: https://cirila.jp/gelnailkit/?srsltid=AfmBOoqLqEo_XZGfd0gSM0xpk9M2PM1XQaFsONHBfhM03V2YjVSh6XS
- セルフジェルネイルを始めてみたいです。できるだけコスパのいいスターターセットが買いたいです。おすすめ知ってる方教えてください。... - Yahoo!知恵袋: https://detail.chiebukuro.yahoo.co.jp/qa/question_detail/q13304962643
- 【2026年最新】ネイリストが教えるジェルネイルキットの選び方/タイプ別おすすめ人気ランキングもご紹介 - Unknown Beauty Place(アンノウン・ビューティ・プレイス): https://unknownbeautyplace.com/nail/1830/
- 【セリアのジェルネイル】全77色を全色見せ!2022年秋冬決定版【セルフネイル】: https://i-voce.jp/feed/1162192/
- 【キャンドゥのジェルネイル】2023年冬の新色含む全63色を全色見せ!【セルフネイル】: https://i-voce.jp/feed/1501344/
- 【ダイソージェルネイル】全41色レビュー!2023年の新色を含む全色見せ【セルフジェルネイル】: https://i-voce.jp/feed/2425541/
Related Reading
- How to Remove Japanese Gel Nails at Home
- Best Japanese Nail Dotting Tools
- Best Japanese Nail Tools for Beginners
- How to Prevent Nail Thinning From Gel Manicures
- Japanese Cuticle Care Routine at Home
— The Nail Atlas Team