How to Do Japanese Mirror Nails: The Complete Guide
Mirror nails — that liquid-metal, chrome-finish effect that looks like your nails were dipped in mercury — have been a global trend for years. If you have ever compared a mirror manicure from a typical Western salon to what comes out of a Japanese nail studio, you know the gap is real.
Quick Answer
- Mirror nails (ミラーネイル) need ultra-fine 1-3 micron chrome powder
- Critical: rub powder onto fully cured NO-WIPE top gel — never standard top
- Japanese particle quality (Pregel, Ageha) is what separates mirror from chrome
- Top techniques: full chrome, ミラーライン (mirror line), ミラー × マグネット
Mirror nails — that liquid-metal, chrome-finish effect that looks like your nails were dipped in mercury — have been a global trend for years. If you have ever compared a mirror manicure from a typical Western salon to what comes out of a Japanese nail studio, you know the gap is real.
Japanese mirror nails are smoother. The reflection is sharper. The finish looks like actual polished metal rather than sparkly powder.
Beyond the basic full-chrome look, Japanese nailists create mirror effects that most Western technicians have never attempted: hair-thin metallic lines, chrome-to-bare gradients, and mirror finishes layered over magnetic patterns that shift as the nail moves.
This guide covers everything: the basic technique for a flawless full-coverage mirror finish, advanced Japanese variations, the specific products that make a difference, common mistakes and how to avoid them, and the troubleshooting steps for the issues that trip up most people.
What Are Mirror Nails?
Photo by asifhaseeb on Pixabay
Mirror nails (ミラーネイル) use extremely fine metallic powder — typically chrome pigment, titanium dioxide-coated mica, or aluminum particles — that is rubbed onto a smooth, cured gel surface. The friction of rubbing causes the powder particles to align flat against the surface, creating a continuous reflective plane. When done correctly, the result is a mirror-like finish that actually reflects images, not just light.
The effect works because of particle size and alignment. Mirror powders contain particles in the 1-5 micron range — small enough to create a smooth optical surface when packed tightly together.
Rubbing the powder with pressure forces particles to lay flat and lock together, eliminating gaps that would scatter light. The result is specular reflection (mirror-like) rather than diffuse reflection (matte or sparkly). The Journal of the Society of Cosmetic Chemists 2018 review on effect pigments describes how particle alignment determines whether a metallic finish reads as sparkle vs. mirror.
Mirror Nails vs. Chrome Nails vs. Metallic Nails
These terms are often used interchangeably, but they describe different quality levels of the same basic effect:
Metallic nails have a metal-like appearance but may not be truly reflective. This can be achieved with metallic gel polish, foil, or coarse metallic powder. The finish sparkles but does not mirror.
Chrome nails are more reflective than metallic nails, with a smooth, shiny surface that reflects light directionally. Chrome powder is finer than basic metallic powder and creates a more convincing metal effect.
Mirror nails are the highest quality level — a perfectly smooth, highly reflective surface where you can see actual reflections. This requires the finest powder, the smoothest base surface, and the most meticulous application technique.
Japanese nailists consistently achieve true mirror-level results because of their product quality and technical standards. The distinction matters because the term "chrome nails" in many Western salons describes a result that Japanese professionals would consider chrome but not mirror.
Materials You Need
Essential Products
Base gel: Any quality base gel works, though fill-in compatible Japanese bases (Leafgel Premium, Pregel) give the smoothest starting surface.
Color gel (optional):
- Black underneath creates the most intense, true-chrome mirror
- White creates a lighter, more platinum effect
- Dark colors deepen the chrome; light colors soften it
No-wipe top gel (CRITICAL): This is the single most important product choice.
The mirror powder must be applied to a fully cured surface with no inhibition layer (the sticky residue on standard gel). Only no-wipe (ノンワイプ) top gels provide this surface. Not all no-wipe gels are equal — you want one that cures to an extremely smooth, hard surface.
Mirror powder: Quality varies enormously. Japanese mirror powders from brands like Pregel Muse (プリジェル ミューズ) and Ageha use ultra-fine particles (1-3 microns) that produce the sharpest reflection. Budget powders with larger or less uniform particles create a chrome effect but not a true mirror.
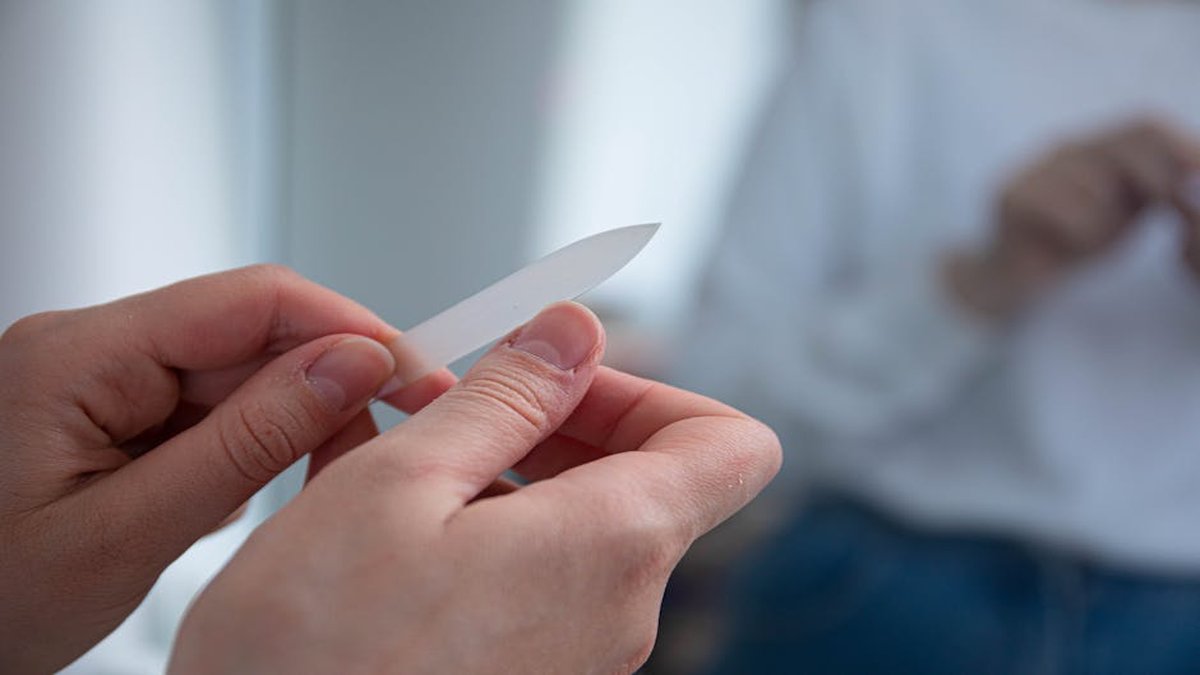
Application tool: A silicone-tipped tool (シリコンチップ), an eyeshadow sponge applicator, or a dense foam pad. Silicone tips give the most control for detail work. Sponge applicators cover large areas evenly.
Dust brush: A soft brush to remove excess powder before sealing.
Sealing top gel: A final top gel layer to protect the mirror finish. This can be a standard or no-wipe top gel.
Recommended Japanese Products
Best no-wipe top gel for mirror: Vetro No-Wipe Top Gel (ベトロ ノンワイプ) — cures to the hardest, smoothest surface, producing the sharpest mirror reflection. Leafgel Premium's top gel is a close second.
Best mirror powder: Pregel Muse Mirror Powder — ultra-fine particles with consistent results. Ageha Mirror Powder is equally excellent with more color options (gold, rose gold, holographic).
Best application tools: Japanese silicone-tipped nail art tools from brands like Nail Labo or Tati. Western equivalents exist but tend to be less precisely shaped.
Basic Mirror Nail Technique: Step by Step
Step 1: Prepare the Nail
Apply base gel and cure. If using the fill-in method, your existing base layer is ready. If starting fresh, apply base gel, cure for 30-60 seconds under LED.
Apply color gel if desired. For the most intense mirror effect, apply two coats of black gel, curing between each. Black provides the best contrast for the metallic reflection.
For a softer effect, use a dark navy, burgundy, or charcoal. Cure the color gel fully — under-cured color gel can create an uneven surface that compromises the mirror finish.
Step 2: Apply No-Wipe Top Gel
This is the critical layer. Apply a thin, even coat of no-wipe top gel. Avoid pooling at the edges or cuticle area — any unevenness will show in the final mirror surface.
Key tip: Thin is better than thick. A thick top gel layer can develop surface waves during curing that create a distorted mirror effect. Apply just enough to coat the nail evenly.
Cure fully. For most no-wipe gels, this means 60 seconds under LED or 120 seconds under UV. Do not under-cure.
The surface must be completely hard and completely dry. Any residual tackiness will cause the powder to clump rather than align.
Key tip: After curing, wait 30-60 seconds for the gel to cool completely. A warm gel surface is slightly softer, and the powder will embed rather than align on the surface.
Step 3: Apply Mirror Powder
Pick up a small amount of mirror powder on your silicone tip or applicator. You need less than you think — start with a tiny amount and add more if needed.
The rubbing technique: Press the powder-loaded tool against the nail surface and rub with moderate, consistent pressure. Use a circular motion or a back-and-forth motion along the length of the nail.
The pressure matters. Light dabbing will not align the particles. You need enough pressure to physically push particles flat against the surface.
Work from the center of the nail outward. Cover the entire cured surface. As the powder adheres and aligns, you will see the surface transform from matte (loose powder) to reflective (aligned powder).
Key tip: The powder will not adhere to skin or uncured areas. If powder sticks to the skin around the nail, it means there was gel overflow that was not cleaned up before curing.
Step 4: Remove Excess Powder
Use a soft dust brush to gently sweep away loose powder. Brush from cuticle to tip — brushing across the nail can scratch the aligned powder layer.
Inspect the finish under a bright light. Look for:
- Bare spots where powder did not adhere (apply more powder and rub again)
- Uneven reflection (more rubbing needed in that area)
- Powder stuck in the cuticle area or sidewalls (clean with a brush dampened in alcohol)
Step 5: Seal the Mirror Finish
Apply a thin coat of top gel over the mirror surface. This protects the powder from wear and adds additional gloss.
Critical choice: Use a no-wipe top gel if possible. Standard top gels leave an inhibition layer that can dull the mirror finish slightly when wiped. However, some nailists prefer standard top gel for its flexibility and durability, accepting a marginal reduction in mirror intensity.
Key tip: Apply the sealing top coat gently. Heavy brush strokes can disturb the aligned powder particles, creating streaks in the mirror surface. Float the gel on with minimal brush contact.
Cure fully. Your mirror nails are complete.
Advanced Japanese Mirror Techniques
Photo by Bru-nO on Pixabay Photo by Mounthive on Pixabay
ミラーライン (Mirror Line) — Ultra-Thin Metallic Lines
This is the technique that separates Japanese mirror work from everything else. Instead of covering the entire nail, mirror powder is applied in a single thin line — the width of a pen stroke — creating a metallic accent that looks like fine jewelry embedded in the nail.
How to create mirror lines:
- Apply base gel and color gel as normal. Cure fully.
- Using a thin liner brush, draw a single line of no-wipe top gel across the nail. The line should be 1-2mm wide. Common placements: across the center (ring nail effect), at the cuticle line (French reverse), or diagonally.
- Cure the line of no-wipe top gel.
- Using a very fine silicone tip (the smallest available), rub mirror powder along only the cured line. The powder will adhere to the cured no-wipe gel but not to the surrounding uncured or previously sealed surface.
- Brush away excess powder.
- Apply overall top coat and cure.
Key tip: The line must be drawn in a single, confident stroke. Hesitation or stopping mid-line creates visible inconsistencies.
Japanese nailists practice line drawing on paper before attempting it on nails. The brush should be fully loaded with gel so it flows smoothly without dragging.
Key tip: Use a silicone tip that is narrower than the line you drew. This gives you the control to stay within the line boundaries. If the tip is wider than the line, you will deposit powder outside the boundaries, creating a fuzzy rather than crisp metallic line.
ミラーフレンチ (Mirror French) — Chrome French Tips
A French tip manicure where the tip portion is mirror-finish chrome instead of white. The technique combines classic French nail architecture with mirror powder application.
- Apply base and nude/pink color gel. Cure.
- Apply no-wipe top gel only on the tip area, creating a clean French tip shape.
- Cure the tip area.
- Rub mirror powder onto the cured tip.
- Clean the border between mirror and nude areas.
- Apply overall top coat and cure.
The challenge is creating a clean, crisp smile line between the mirror tip and the bare base. Any powder migration beyond the tip creates a blurry transition. Using a fine brush to "erase" stray powder with a small amount of alcohol or gel cleanser helps maintain the crisp edge.
ミラーグラデーション (Mirror Gradation) — Chrome Gradient
Mirror powder applied in a gradient, transitioning from full chrome at one area (usually the tip) to bare nail at another (usually the cuticle). This creates a liquid-metal-fading-to-skin effect.
Technique: Apply no-wipe top gel to the entire nail and cure. Then, when applying mirror powder, press firmly and make many passes at the tip, gradually reducing pressure and passes as you move toward the cuticle. The key is powder density control — more powder = more mirror, less powder = more sheer.
This technique requires practice. Too much powder everywhere creates full chrome. Too little leaves a patchy, uneven gradient.
The sweet spot is heavy application at the tip with a smooth reduction in both pressure and amount toward the base.
Alternative gradient method: Some nailists achieve the gradient by applying no-wipe top gel in varying thickness — thicker at the tip, thinner at the cuticle. Thicker gel creates a harder surface that grabs more powder, while thinner gel grabs less, creating a natural gradient effect.
ミラー × マグネット (Mirror x Magnet) — Chrome Over Magnetic Patterns
One of the most technically complex and visually stunning Japanese mirror variations. Magnetic gel creates a pattern of iron particles beneath the surface, and mirror powder on top creates a chrome finish that reveals the magnetic pattern as the nail moves.
- Apply base gel and cure.
- Apply magnetic gel. Position a magnet above the nail to arrange the iron particles into the desired pattern (stripe, star burst, scattered, diagonal).
- Cure the magnetic gel with the magnet still in position.
- Apply no-wipe top gel over the magnetic gel. Cure.
- Apply mirror powder over the entire surface.
- Seal with top coat and cure.
The magnetic pattern is visible through the mirror surface because the iron particles create subtle ridges and valleys that reflect light at slightly different angles. The result is a chrome surface with an underlying holographic-like depth effect that shifts as the viewing angle changes. Nail Venus issue 73 (2024) featured this combination as the editorial cover technique.
ミラー × ニュアンス (Mirror x Nuance) — Selective Mirror Accents
Rather than full-coverage mirror, this technique applies chrome powder to selected areas of a nuance nail design. The powder is applied only to specific spots — usually raised areas, random patches, or the peaks of textured gel — creating a design that mixes matte, glossy, and chrome finishes.
Technique: Create a nuance nail with textured elements (raised gel, foil, varying thickness). Cure fully. Apply no-wipe top gel over the areas where you want mirror finish.
Cure. Apply mirror powder to those specific areas only. The surrounding areas without no-wipe gel will not accept the powder, maintaining their original matte or glossy finish.
This technique requires planning. You need to know which areas will receive mirror treatment before applying the no-wipe gel, because the powder will only adhere where no-wipe gel has been cured.
うねうね × ミラー (Uneune x Mirror) — Mirror on Wavy Lines
Wavy raised gel lines (うねうねネイル) are created, cured, and then selectively finished with mirror powder. The chrome covers only the raised waves while the flat areas between them remain a different finish (clear, matte, or colored). This creates a dramatic 3D metallic ribbon effect.
- Apply base and color gel. Cure.
- Using builder gel and a thin brush, create raised wavy lines across the nail. Cure each line before adding the next to prevent them from merging.
- Apply no-wipe top gel over the raised lines only (careful brushwork required). Cure.
- Rub mirror powder onto the cured raised lines. The powder will not adhere to the surrounding flat areas because they have no fresh no-wipe gel.
- Apply overall top coat and cure.
Troubleshooting Common Mirror Nail Problems
Problem: Mirror finish is patchy or uneven
-
Cause 1: Under-cured no-wipe top gel. If the surface is not fully hard, powder embeds instead of aligning.
-
Fix 1: Increase cure time by 15-30 seconds. Try curing under both UV and LED if your lamp supports both.
-
Cause 2: Insufficient pressure during powder application.
-
Fix 2: Press harder. The rubbing motion should be firm enough that you can feel the powder compressing against the surface.
-
Cause 3: Low-quality mirror powder with inconsistent particle sizes.
-
Fix 3: Switch to a finer-grade powder. Japanese brands like Pregel Muse or Ageha consistently produce excellent results.
Problem: Powder sticks to skin around the nail
- Cause: Gel overflow onto the skin that was cured in place.
- Fix: Clean up gel overflow before curing. After powder application, use a brush dampened with alcohol to remove powder from skin and sidewalls.
- Prevention: Apply a thin layer of cuticle oil around the nail before gel application — the oil prevents gel from bonding to skin.
Tip from Japanese nailists: Some professionals lightly sand the skin around the cured nail with a fine sponge file before applying powder. This removes any microscopic gel residue from the skin surface.
Problem: Mirror finish dulls after top coat application
- Cause: Heavy brush strokes when applying sealing top coat disturb the aligned powder particles.
- Fix: Apply sealing top coat with the lightest possible touch. Load the brush heavily so the gel flows off the brush onto the nail without requiring the brush to make contact with the powder surface.
Some nailists use a dabbing motion rather than a stroke.
Alternative fix: Try "floating" the top coat — hold the brush just above the nail surface and let the gel drip and spread by gravity and surface tension rather than being physically brushed on.
Problem: Mirror powder changes color or darkens after top coat
Cause: Some mirror powders react with certain top gel formulations, especially those with high photoinitiator content.
Fix: Test your specific powder + top gel combination on a practice tip before using on a client. If the reaction occurs, switch to a different top gel or add a thin layer of clear builder gel between the powder and the sealing top coat.
Problem: Cracks or lines appear in the mirror surface
Cause: The top gel layer is too rigid and cracks when the nail flexes.
Fix: Use a more flexible top gel, or apply a thinner sealing layer. Vetro's top gel is very hard and may crack on flexible natural nails — switch to Pregel's more flexible top gel for natural nail applications.
Problem: Mirror powder will not adhere at all
-
Cause 1: You are using a standard top gel (not no-wipe). The inhibition layer prevents powder adhesion.
-
Fix 1: Switch to a no-wipe top gel. This is non-negotiable for mirror nails.
-
Cause 2: The no-wipe gel is contaminated with dust, skin oils, or cleaner residue.
-
Fix 2: Ensure the cured no-wipe surface is clean. Do not wipe it with anything after curing. Apply powder immediately after the gel cools from curing.
-
Cause 3: The no-wipe gel has expired or degraded.
-
Fix 3: Check the expiration date. Gel that has been stored improperly (exposed to light or heat) can lose its surface properties.
Mirror Nail Color Guide: How Base Colors Affect the Finish
The color gel you apply under the mirror powder dramatically changes the final appearance. Here is a reference guide:
Silver Mirror Powder Over Different Bases
- Black base: Creates the most intense, true-silver chrome. The black provides maximum contrast and makes the mirror effect sharper and more reflective. This is the standard choice for a classic mirror nail.
- Dark navy base: Adds a subtle cool undertone to the chrome, creating a gunmetal or blue-steel effect.
- Dark burgundy base: Produces a unique reddish-silver that shifts between warm and cool depending on the light.
- White base: Creates a lighter, more platinum or pearl-like chrome. Less dramatic than black but very elegant.
- Nude/beige base: Produces a warm champagne chrome that blends with skin tone. Popular for mirror French tips.
- Clear/no base: Creates a sheer, ghostly chrome effect where the natural nail shows through. The subtlest mirror option.
Gold Mirror Powder Over Different Bases
- Black base: Intense, high-contrast gold that looks like polished brass or dark gold jewelry.
- Warm brown base: Rich, warm gold that reads as luxurious and autumnal. Perfect for the Pantone 17-1230 Mocha Mousse Color of the Year (2025).
- White base: Light, bright gold with a platinum-gold warmth. Reads as high-end and clean.
- Yellow base: Amplifies the gold tone for maximum warmth.
Rose Gold Mirror Powder
- Nude pink base: The most natural-looking rose gold — blends with warm skin tones.
- Black base: Dramatic, high-contrast rose gold with red undertones.
- White base: Soft, feminine rose gold that reads as bridal or romantic.
Maintaining Mirror Nails: Care Tips
Mirror nails require slightly more care than standard gel nails to maintain their finish.
Avoid abrasive surfaces. The sealing top coat protects the mirror layer, but repeated contact with rough surfaces (like denim pockets, zippers, or keyboard edges) will eventually create micro-scratches that dull the reflection.
Hand cream application. Some hand creams contain mild acids or exfoliants that can gradually cloud the top coat surface.
Apply cream to hands but avoid rubbing it directly over the nail surface. Let the cream absorb into skin before touching the nails.
Cleaning chemicals. Household cleaners, alcohol-based sanitizers, and acetone can all attack the sealing top coat and compromise the mirror finish.
Wear gloves for cleaning tasks. If hand sanitizer contacts the nails, rinse with water promptly.
The two-week sweet spot. Mirror nails look their most pristine for the first two weeks. After that, the gradual accumulation of micro-scratches reduces the mirror quality to a high-shine chrome.
This is still attractive, but if you want a continuously perfect mirror, budget for appointments every two weeks rather than the standard three to four.
Statistics and Product Context
- Mirror nails have been a top 10 Japanese nail trend for every season since 2020, per Nail Venus magazine's annual trend report (2024)
- The global nail art market is valued at approximately $15 billion as of 2024 per Grand View Research's nail care market analysis (2024)
- Japanese mirror powder market is dominated by domestic brands with particle sizes of 1-3 microns, compared to 3-10 microns for typical imported powders
- Hot Pepper Beauty's 2025 H1 nail census reported the nail market at 145.5 billion yen — a five-year high
- Mirror nails combined with magnetic gel was identified as one of the top emerging combinations for 2025 by multiple Japanese beauty publications
- Average price for a mirror nail set in Japanese salons is 8,000-12,000 yen ($55-$80), with complex variations priced at 12,000-18,000 yen ($80-$120) per Hot Pepper Beauty pricing data (2024)
- No-wipe top gel accounts for an estimated 35-40% of all top gel sales in Japan, driven significantly by mirror nail demand
Product Recommendations by Technique
| Technique | Recommended Powder | Recommended Top Gel | Recommended Tool |
|---|---|---|---|
| Full mirror | Pregel Muse Mirror Powder | Vetro No-Wipe Top | Foam sponge applicator |
| Mirror line | Ageha Fine Mirror Powder | Vetro No-Wipe Top | Ultra-fine silicone tip |
| Mirror gradient | Any quality mirror powder | Vetro No-Wipe Top | Dense foam pad |
| Mirror x Magnet | Pregel Muse Mirror Powder | Vetro No-Wipe Top | Silicone tip |
| Selective mirror accents | Ageha Mirror Powder | Leafgel Premium No-Wipe | Fine silicone tip |
Frequently Asked Questions
How long do mirror nails last?
With proper application and a quality sealing top coat, mirror nails last as long as any other gel nail design — typically 3-4 weeks. The mirror effect may dull very slightly over time as the top coat develops micro-scratches from daily wear, but this happens so gradually that it is not noticeable under normal conditions. Using a harder top gel (like Vetro) extends the pristine mirror period. The fill-in maintenance method allows you to preserve the mirror finish even longer by only replacing the top layers.
Can I do mirror nails with regular nail polish instead of gel?
Not effectively. Mirror powder requires a completely cured, tack-free surface to align properly. Regular nail polish does not provide this — even when fully dry, polish has a different surface chemistry that does not grab mirror particles the same way. Some nail artists have achieved rough chrome effects by rubbing powder onto tacky polish, but the result is always significantly inferior to gel-based mirror nails. If you want true mirror nails, gel is non-negotiable.
Why does my mirror finish look sparkly instead of mirror-like?
Two possible causes: either your mirror powder has particles that are too large (anything over 5 microns will look sparkly rather than reflective), or you are not applying enough pressure during the rubbing step. Larger particles cannot pack tightly enough to create a smooth reflective surface. Under-pressure application leaves particles randomly oriented rather than flat-aligned. Switch to a finer powder and increase your rubbing pressure. Japanese-made mirror powders from brands like Pregel Muse and Ageha are formulated specifically for true mirror results.
Is mirror powder safe? Will it damage my nails?
Mirror powder itself is applied on top of cured gel and never touches the natural nail, so it poses no direct risk to nail health. The powder is typically composed of chrome pigment, coated mica, or aluminum particles — materials used widely in cosmetics. However, always purchase mirror powder from reputable brands, as very cheap imported powders may not meet cosmetic safety standards. The powder can be messy — wear a mask if applying in a poorly ventilated space to avoid inhaling fine particles.
What is the difference between mirror powder and aurora powder?
Mirror powder creates a monochromatic metallic reflection — silver, gold, rose gold, etc. — that looks like polished metal. Aurora powder creates a prismatic, rainbow-shifting effect — like the surface of a soap bubble or the inside of an abalone shell. The application technique is identical (rub onto cured no-wipe gel), but the visual results are completely different. Many Japanese nailists use both on the same set — mirror powder on some nails and aurora powder on others — for a design that balances metallic solidity with iridescent playfulness.
Explore Your Style
Ready to try Japanese mirror nails? Use our Product Finder to source the exact Japanese powders and gels recommended in this guide, take our Style Quiz to discover which mirror nail variation matches your aesthetic, or browse our Technique Guide for video tutorials of each technique.
— The Nail Atlas Team
Related Reading from our editorial team:
- Top 10 Japanese Nail Art Trends & Styles to Try in 2026 (Magazine Decoded)
- Top 10 Tokyo Nail Studios with English Booking Compared: Tourist-Friendly Salons (2026)
- Top 10 Japanese Gel Nail Polish Brands Compared: Para Gel, Pre Gel, Calgel (2026)
- Top 10 Japanese Nail Art Online Courses Compared: Skill Level, Cost, English Subtitles (2026)
- Top 10 Japanese Nail Tools & Art Supplies Compared: Brushes, Stickers, Foils, Stones (2026)