How to Do Japanese Gel Nails at Home: Complete Beginner Guide
- Gel nails last 3-4 weeks, significantly longer than manicure's 1 week duration, according to Cin-Cia nail school (translated from Japanese).
Last updated: April 2026
Affiliate Disclosure: We may earn a commission when you purchase through our links. This does not affect our editorial independence.
Quick Answer
- Gel nails last 3-4 weeks, significantly longer than manicure's 1 week duration, according to Cin-Cia nail school (translated from Japanese).
- Prep work (preparation) takes about 30 minutes, and the actual application takes 60-90 minutes, as detailed by Cin-Cia nail school (translated from Japanese).
- You can save over 100,000 yen annually by doing gel nails yourself instead of going to a salon, which also saves 2-3 hours per visit.
- Many essential tools can be substituted with household items, making it possible to start with a low initial investment.
Japanese gel nails offer a durable and vibrant alternative to traditional manicures, allowing for intricate designs and a long-lasting finish that can endure for 3 to 4 weeks. This contrasts sharply with regular nail polish, which often chips within 2 to 3 days and rarely lasts beyond a week, as noted by Cin-Cia nail school Cin-Cia Nail School's guide to gel nail basics. While the initial setup for self-gel nails involves acquiring more tools than a basic manicure, many items can be substituted with common household products, helping to keep initial costs down. Mastering the technique at home can lead to substantial savings, potentially exceeding 100,000 yen per year compared to salon visits, each of which typically consumes 2 to 3 hours of your time, according to Watts Online (translated from Japanese, https://watts-online.jp/blogs/column/gel-nails-turorial?srsltid=AfmBOoq5OKZtT2QK5haDbRaJQbaJMhOQlkJoY7PykNxOG1Ylh1Z4u9tk). This guide will walk beginners through the necessary tools, preparation steps, and application techniques to achieve beautiful, salon-quality gel nails in the comfort of their own home.
What are Japanese Gel Nails, and How Do They Differ from Regular Manicures?
Japanese gel nails are a type of nail art that uses a synthetic resin applied to the natural nail, which is then cured and hardened under an LED or UV light. This process creates a durable, glossy finish that is significantly more resilient and long-lasting than traditional nail polish, which relies on air-drying. The fundamental difference lies in the curing mechanism: gel nails undergo a chemical reaction triggered by light, while manicures simply evaporate solvents to dry.
Understanding the Curing Process
One of the most notable distinctions between gel nails and traditional manicures is the drying and hardening time. Regular nail polish requires approximately 15 to 30 minutes per coat to dry, and it can take up to half a day for the layers to be completely dry and hardened. During this extended drying period, there's a high risk of smudging, denting, or accidentally ruining the manicure. In contrast, gel nails harden almost instantly. Each layer of gel polish typically cures in just 15 to 30 seconds under a UV or LED light, achieving full hardness in about 30 to 60 seconds, as explained by Cin-Cia nail school (translated from Japanese, https://cin-cia.com/jelnail-yarikata/). This rapid curing eliminates the waiting time and the fear of smudges, making the application process much more efficient and less prone to errors. The immediate hardening also means you can resume normal activities almost immediately after the final cure.
Durability and Longevity
The longevity of gel nails far surpasses that of traditional manicures. While regular nail polish typically lasts for a maximum of one week to ten days, it often begins to chip or peel within just two to three days for many individuals. Gel nails, however, are designed for extended wear, consistently lasting for three to four weeks without chipping or losing their shine. This superior durability is a major advantage for those who desire consistently well-maintained nails without frequent touch-ups or reapplication. The robust nature of the cured gel forms a protective layer over the natural nail, making it less susceptible to daily wear and tear from household chores, hand washing, and other activities that typically cause regular polish to degrade quickly.
Artistic Freedom and Design Versatility
Gel nails offer a significantly broader spectrum of artistic possibilities compared to traditional manicures. Because each layer of gel hardens instantly, intricate designs, layering of colors, and the application of various embellishments like glitter, stones, or decals can be performed with precision without the risk of colors bleeding or designs smudging. The viscosity of gel also allows for more three-dimensional art and texture, which is difficult to achieve with the thinner consistency of regular polish. This makes gel nails the preferred choice for those who enjoy expressive and elaborate nail art. Even with a limited palette of gel colors, the ability to layer, blend, and add details means that a wide variety of unique designs can be created each month, offering endless creative potential.
Cost and Convenience Considerations
While the initial investment in tools for self-gel nails is higher than for regular nail polish, the long-term cost savings can be substantial. Attending a professional nail salon for gel services can accumulate to over 100,000 yen annually, with each salon visit requiring a commitment of 2 to 3 hours, including travel and waiting times, according to Watts Online (translated from Japanese, https://watts-online.jp/blogs/column/gel-nails-turorial?srsltid=AfmBOoq5OKZtT2QK5haDbRaJQbaJMhOQlkJoY7PykNxOG1Ylh1Z4u9tk). By learning to do gel nails at home, individuals can save both money and time, enjoying the flexibility to change their nail designs at their convenience. "Self-gel nails allow you to change them whenever you like. By practicing proper pre-treatment (preparation) and application methods, you can achieve salon-level durability," said MAINEE, a salon owner and YouTuber (translated from Japanese, https://i-voce.jp/feed/1861396/). Although gel nails require specific tools for application and removal, the convenience of being able to perform the service at home, on your own schedule, often outweighs the perceived drawbacks of the initial setup.
The Trade-offs: Off-Time and Initial Setup
Despite the numerous advantages, gel nails do have some trade-offs. The removal process, known as "off," is more involved than simply wiping away regular polish with acetone. Gel nails require soaking in a specialized remover for 10 to 15 minutes, followed by gentle scraping, which can take longer than the few minutes needed for traditional polish removal. Additionally, the initial setup for gel nails requires a more extensive list of tools compared to the minimal items needed for a basic manicure. However, many of these tools can be purchased affordably, and some can even be substituted with everyday household items, making the barrier to entry lower than it might initially appear. For many, the benefits of quick hardening, long-lasting wear, and diverse artistic options make gel nails a more convenient and satisfying choice in the long run.
What Essential Tools Do You Need for DIY Japanese Gel Nails?
To embark on your self-gel nail journey, you'll need a collection of specific tools, which can be categorized into those used for "preparation" (pre-treatment) and those for "coloring" (application and finishing). While the list might seem extensive at first, it's important to know that many items can be substituted with common household goods, significantly reducing your initial investment. A basic set of gel nail tools includes 15 items, with some being "recommended" rather than "essential," offering flexibility for beginners to start with the core necessities and gradually expand their kit (translated from Japanese, https://watts-online.jp/blogs/column/gel-nails-turorial?srsltid=AfmBOoq5OKZtT2QK5haDbRaJQbaJMhOQlkJoY7PykNxOG1Ylh1Z4u9tk).
Tools for Preparation (Pre-treatment)
The "preparation," or "pre-treatment" phase, is critical for ensuring your gel nails adhere well and last longer. These tools are used to clean, shape, and prepare the natural nail surface.
- Wipe/Lint-free cloth: Used with alcohol to remove oil, moisture, and dust from the nail surface. Kitchen paper can be used as a substitute if it's lint-free.
- Ethanol (Disinfectant): Essential for sanitizing your fingers and nails before starting. This removes any lingering oils or contaminants that could affect gel adhesion.
- Emery Board: Used to shape the free edge of your nails. Opt for fine-grit boards to avoid over-filing and damaging your nails.
- Cuticle Pusher (or Wood Stick with Cotton): Gently pushes back the cuticles from the nail plate. A wood stick wrapped in cotton can be a suitable alternative.
- Cuticle Remover (or Warm Water): Helps soften cuticles for easier pushing. If you don't have a dedicated remover, soaking your fingers in warm water in a finger bowl (or a regular basin) can also work.
- Sponge Buffer: A finer-grit file used to gently abrade the nail surface, creating a rough texture that helps the gel adhere better. Choose a fine-grit buffer to prevent excessive thinning of the nail.
- Dust Brush: Used to brush away any dust created during filing and buffing. While recommended, a clean, soft brush or even a dry paper towel can serve as a temporary substitute.
Starting with substitutes for items like wipes, cuticle pushers, and cuticle removers can significantly lower your initial outlay. You can always invest in specialized tools as you become more comfortable with the process.
Tools for Coloring (Application and Finishing)
Once your nails are prepped, these tools are used for applying the gel, curing it, and finishing the look.
- Base Gel: This is the first layer applied directly to the prepped natural nail. Its primary function is to enhance the adhesion between the natural nail and the subsequent layers of color gel. For beginners, it's highly recommended to start with soft gel types, as they are generally easier to apply and remove compared to higher-viscosity hard gels.
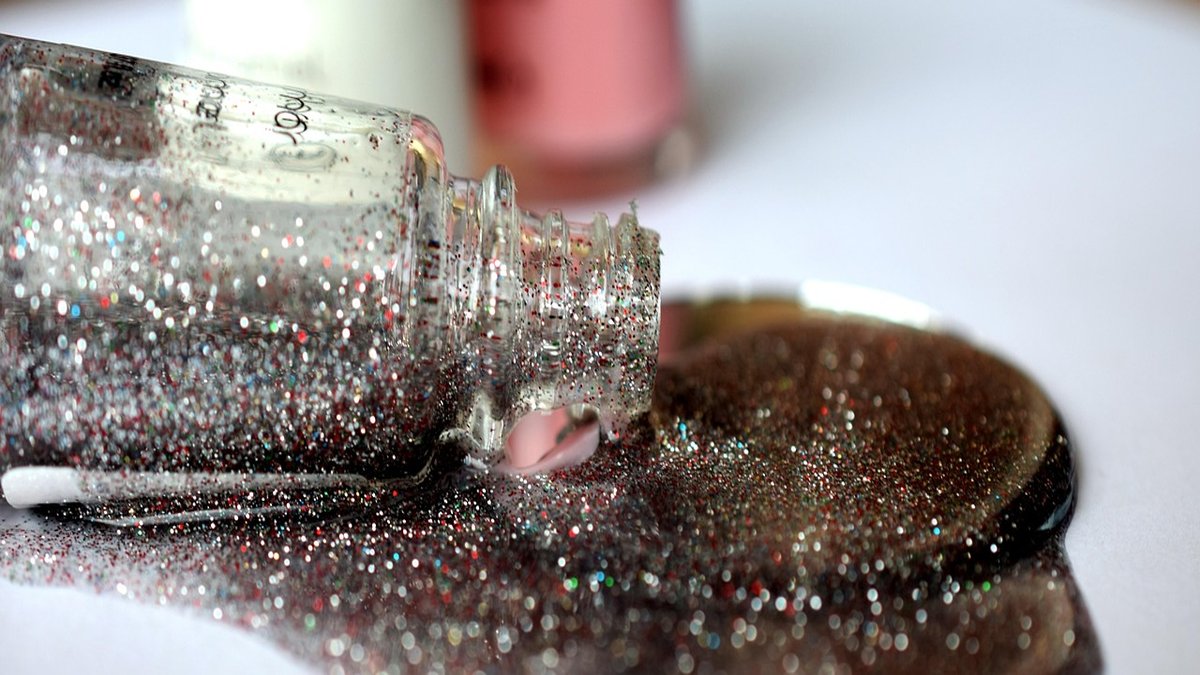
- Color Gel: These are your chosen shades for the design. For a simple single-color application, one color is sufficient. If you plan to create art or multi-color designs, you'll need several different colors. Gels come in two main types:
- Bottle Type: Often found in 100-yen stores, these gels come with an applicator brush attached to the cap, similar to traditional nail polish. They are very beginner-friendly as they eliminate the need to buy separate brushes.
- Container (Pot) Type: These gels come in small pots and require separate nail brushes for application. They are ideal for intricate nail art, as they allow for more control and the use of different brush sizes and shapes. Using separate brushes for different colors or types of gel is a key step towards mastering gel nail art.
- Top Gel: The final layer applied to seal in the color and provide a durable, glossy finish. There are two main types:
- Non-Wipe Top Gel: This type cures completely under the light and does not leave a sticky "uncured" layer, meaning no wiping is needed afterward. However, some users report experiencing more heat during curing with this type.
- Wipe-Off Top Gel: This type leaves a sticky residue after curing, which needs to be wiped off with a gel cleanser. This is often recommended for beginners as it tends to generate less heat during curing.
- Nail Brushes: Essential for applying pot-type gels and creating designs.
- Round Brush: Recommended for beginners as its curved shape makes it easy to apply gel along the cuticle line.
- Square Brush: Useful for larger nails.
- Short Round Brush: Ideal for smaller nails.
- Art Brush: Features a fine tip, indispensable for intricate designs and detailed work.
- UV/LED Light: This is a crucial tool for curing the gel. Ensure the light you purchase is compatible with the type of gel you are using (UV gel, LED gel, or UV/LED dual-compatible gel). Modern beginner-friendly kits often include lights that support both UV and LED curing, offering versatility.
- Kitchen Paper: Useful for wiping excess gel from your nail brushes when changing colors or cleaning them. It's important to use fresh kitchen paper each time to prevent contamination.
- Gel Cleanser (or Isopropyl Alcohol): Used to wipe off the sticky "uncured" layer left by wipe-off top gels or to clean brushes.
- Cotton Pads/Wipes: Specifically lint-free ones, used with gel cleanser for wiping. If lint-free wipes aren't available, a very low-lint cotton pad can be used carefully.
- Cuticle Oil: Applied after the gel nails are complete to moisturize the cuticles and surrounding skin, promoting nail health. While not strictly for application, it's an important finishing step for overall nail care.
By carefully selecting your tools and utilizing substitutes where possible, you can assemble a functional self-gel nail kit without breaking the bank. Focusing on the "essential" items first, as indicated by Watts Online, will provide a solid foundation for your at-home gel nail practice.
How Do You Prepare Your Nails for Gel Application?
Preparing your nails, a process known as "preparation" or "pre-treatment" (プレパレーション), is the most crucial step for ensuring your gel nails adhere properly and last for their full duration. Skipping or rushing this stage can lead to premature lifting or chipping. This initial care typically takes about 30 minutes, as outlined by Cin-Cia nail school (translated from Japanese, https://cin-cia.com/jelnail-yarikata/). A thorough preparation creates a clean, dry, and slightly textured surface that allows the gel to bond effectively with your natural nail.
Step 1: Sanitize Your Hands and Nails
Before touching your nails, it is essential to begin with proper hygiene. Apply an ethanol-based disinfectant to your hands and nails. Use a lint-free wipe or a piece of kitchen paper soaked in ethanol to thoroughly clean each nail plate. The goal here is to remove any surface oils, moisture, or dust particles that might be present on your nails. A clean surface is paramount for gel adhesion; even microscopic residues can prevent the gel from bonding correctly, leading to lifting or peeling. This step ensures a sterile environment and optimal conditions for the gel application.
Step 2: Shape Your Nails with an Emery Board
Next, use an emery board to gently shape the free edge of your nails. Decide on your desired nail shape—whether square, oval, almond, or round—and file in one direction to avoid fraying the nail edge. It's important to use a fine-grit emery board to prevent excessive filing or damage to the natural nail. Avoid filing back and forth aggressively, as this can weaken the nail structure. The aim is to create a consistent and smooth nail edge that will serve as a clean foundation for the gel. This step also helps to remove any rough edges that could snag or cause the gel to lift prematurely.
Step 3: Push Back and Clean Cuticles
The cuticles play a vital role in nail health, but excess cuticle tissue on the nail plate can interfere with gel adhesion. Apply a small amount of cuticle remover to your cuticles, or soak your fingertips in warm water for a few minutes to soften them. Then, using a cuticle pusher or a wood stick wrapped in cotton, gently push back the cuticles from the nail plate. Be careful not to apply too much pressure or push too aggressively, as this can damage the delicate nail matrix and lead to ridges or infections. The goal is to clear the nail plate of any non-living tissue that might prevent the gel from adhering directly to the nail. After pushing back, you can carefully remove any loose or non-living skin around the nail plate, but avoid cutting live skin.
Step 4: Gently Buff the Nail Surface
After shaping and cuticle work, the next step is to gently buff the surface of your natural nails. Use a fine-grit sponge buffer to lightly abrade the nail plate. The purpose of buffing is not to thin the nail, but to create a microscopically rough surface that the base gel can grip onto more effectively. Buff the entire nail surface, paying attention to the areas near the cuticles and sidewalls. After buffing, use a dust brush to thoroughly remove all the fine dust created. Any remaining dust can act as a barrier between the gel and the nail, leading to poor adhesion. Follow up with another wipe of ethanol on a lint-free cloth to ensure the nail is completely free of dust and any residual oils or moisture. This meticulous cleaning is crucial for optimal gel bonding and preventing early lifting.
Step 5: Dehydrate (Optional but Recommended)
For some individuals, especially those with naturally oily nail plates, an additional dehydration step can be beneficial. After cleaning and buffing, apply a nail dehydrator or primer. These products temporarily remove any remaining moisture and oil from the nail surface, further enhancing gel adhesion. While not always listed as an absolute "must-have" for beginners, it can significantly improve the longevity of your gel nails, especially if you've experienced lifting in the past. Always follow the manufacturer's instructions for any dehydrator or primer you use. Once these preparation steps are complete, your nails are ready for the application of the base gel, setting the stage for a beautiful and long-lasting gel manicure.
What Are the Steps for Applying Gel Nail Polish?
Applying gel nail polish involves a series of layered steps, each requiring careful attention and proper curing under a UV/LED light. This process is more involved than painting with traditional polish but yields a significantly more durable and professional-looking result. The entire application process, from base gel to top coat, typically takes 60 to 90 minutes, as estimated by Cin-Cia nail school (translated from Japanese, https://cin-cia.com/jelnail-yarikata/). Patience and precision are key to achieving a flawless finish that lasts. For more details, see Watts Online's complete gel nail tutorial.
Step 1: Apply the Base Gel
The base gel is the foundation of your gel manicure and is crucial for adhesion. Before applying, ensure your prepped nails are completely clean, dry, and free of dust. Pick up a small amount of base gel with your brush (if using a pot type) or use the brush attached to the bottle. Apply a very thin, even layer of base gel to the entire nail plate, from the cuticle area to the free edge. Be careful not to let the gel touch your skin or cuticles, as this can cause lifting. If any gel gets on your skin, use a wood stick or a small brush dipped in cleanser to clean it off before curing. After applying to all nails on one hand (or a few fingers at a time, if preferred), place your hand under the UV/LED light and cure according to the product's instructions, typically 30-60 seconds. The base gel forms a sticky layer after curing, which is normal and helps the color gel adhere. Do not wipe this sticky layer. For beginners, soft gels are recommended for the base layer due to their easier handling and lower viscosity compared to hard gels.
Step 2: Apply the Color Gel
Once the base gel is cured, it's time for the color gel. Choose your desired color and apply a thin, even coat over the cured base gel. Again, avoid letting the gel touch your skin or cuticles. Thin coats are essential; thick coats may not cure properly and can lead to bubbling or wrinkling. If you are using a pot-type gel, use a dedicated nail brush for application. For larger nails, a square brush is effective, while smaller nails might benefit from a short round brush. A round brush is generally good for beginners as it helps follow the natural curve near the cuticle. After applying the first coat of color to all nails, cure them under the UV/LED light for the recommended time (e.g., 30-60 seconds).
Step 3: Apply Additional Coats of Color Gel (if needed)
Most color gels require two thin coats to achieve opaque and vibrant color. After curing the first coat, apply a second thin, even coat of color gel. If you are doing nail art, you can apply different colors or create designs at this stage, curing each design element or color layer individually to prevent smudging. For intricate designs, a fine-tipped art brush is indispensable. Remember to clean your brush on kitchen paper when switching between colors or if too much gel accumulates. Cure the second coat of color gel under the light. If you desire a more intense color, a third thin coat can be applied and cured, but always prioritize thin layers for proper curing.
Step 4: Apply the Top Gel
The top gel is the final layer that seals your design, provides a high-gloss finish, and adds an extra layer of durability. Apply a thin, even coat of top gel over the cured color layers. Ensure you cover the entire nail surface, including capping the free edge (applying a thin line of gel along the tip of the nail) to prevent chipping and improve longevity. Be careful not to apply the top gel too thickly, as this can also lead to improper curing or a bulky look. Like the previous layers, avoid contact with skin and cuticles. Once applied to all nails, cure under the UV/LED light for the recommended time, which might be slightly longer for some top gels (e.g., 60-120 seconds).
Step 5: Wipe Off the Uncured Layer (if using wipe-off top gel)
If you used a "wipe-off" type of top gel, your nails will have a sticky, tacky layer after curing. This is known as the "uncured layer" or "inhibition layer" and is a normal byproduct of the gel curing process. To remove it, soak a lint-free wipe or cotton pad with gel cleanser (or isopropyl alcohol) and gently wipe each nail until the stickiness is gone and a high shine appears. If you used a "non-wipe" top gel, this step is not necessary, as it cures completely without leaving a sticky residue. While non-wipe types are convenient, beginners might prefer wipe-off types as they sometimes generate less heat during curing.
Step 6: Apply Cuticle Oil
The final step is to nourish your cuticles and the surrounding skin. Apply a small drop of cuticle oil to the base of each nail and gently massage it into the cuticles and sidewalls. This step rehydrates the skin, prevents dryness, and helps maintain the overall health of your nails and the longevity of your gel manicure. This completes the gel nail application process, leaving you with a durable, shiny, and salon-quality manicure.
How Do You Choose the Right Gel Nail Kit?
Choosing the right gel nail kit is a critical first step for beginners, as it directly impacts ease of use, safety, and the quality of your results. With many options available, focusing on key features like light compatibility, ingredient safety, and value will help you make an informed decision. Look for kits that include both UV/LED lights, as most beginner products are now compatible with both, offering greater versatility and ensuring your gels will cure properly.
Understanding UV/LED Light Compatibility
The curing light is arguably the most important piece of equipment in a gel nail kit. Gels are formulated to cure under either UV (ultraviolet) light, LED (light-emitting diode) light, or both.
- UV Lights: These lights use fluorescent bulbs that emit a broad spectrum of UV wavelengths. They can cure almost any type of gel, but the bulbs need to be replaced periodically (typically every 6-12 months), and curing times can be longer (around 2 minutes per layer).
- LED Lights: These lights use LED diodes and emit a narrower, more intense spectrum of light. They cure LED-specific gels much faster (often 30-60 seconds per layer) and the bulbs typically last for tens of thousands of hours, meaning they rarely need replacement. However, they cannot cure all UV-only gels.
- UV/LED Dual Lights: The most recommended option for beginners are lights that are compatible with both UV and LED gels. These dual-spectrum lights combine the benefits of both technologies, allowing you to cure a wider range of gel products without worrying about compatibility. Many modern beginner kits include these versatile lights, ensuring that any gel you purchase, whether it's a UV-only or LED-only formula, will cure effectively. This flexibility is particularly useful as you explore different brands and types of gel polishes.
Prioritizing Nail and Skin Health
When selecting a kit, consider brands that emphasize "nail and skin friendliness." Some brands formulate their gels and related products with ingredients that are less harsh on natural nails and the surrounding skin. For example, Cirila (シリラ) offers a "next-generation gel nail kit" where all items are developed with "kindness to nails and skin" as a core principle (translated from Japanese, https://cirila.jp/gelnailkit/?srsltid=AfmBOoqLqEo_XZGfd0gSM0xpk9M2PM1XQaFsONHBfhM03V2YjVSh6XS). Such kits often include base and top gels designed to minimize damage, and removers that are less dehydrating. This focus on gentle formulations can be particularly beneficial for beginners who are still learning proper application and removal techniques, reducing the risk of nail damage or irritation. Checking reviews and product descriptions for terms like "non-toxic," "low-acid," or "gentle formula" can help guide your choice toward healthier options.
Evaluating Kit Contents and Value
Gel nail kits vary widely in what they include. A typical starter kit should contain:
- A UV/LED curing lamp.
- Base gel.
- Top gel (preferably a non-wipe type for convenience, or a wipe-off type if you prefer less heat).
- One or more color gels.
- Essential preparation tools like an emery board, buffer, and cuticle pusher.
- Gel cleanser and cotton pads.
- Sometimes, additional items like cuticle oil or nail art tools.
Starter kits are often a cost-effective way to acquire multiple essential items at once. For instance, Cirila gel nail kits are available with varying numbers of color gels: a kit with 1 color costs 12,680 yen, a kit with 2 colors costs 13,980 yen, and a kit with 3 colors costs 14,980 yen (translated from Japanese, https://cirila.jp/gelnailkit/?srsltid=AfmBOoqLqEo_XZGfd0gSM0xpk9M2PM1XQaFsONHBfhM03V2YjVSh6XS). When evaluating value, consider not just the price, but also the quality of the included items and whether the color gels match your personal preferences. Some kits might include colors you don't like, making them less valuable despite a lower price point. It's also wise to check if the kit gels are soft gels, which are generally easier for beginners to work with compared to hard gels due to their lower viscosity and easier removal. Reading reviews from other beginners can provide insight into the user-friendliness and overall satisfaction with a particular kit.
Considering Brand Reputation and Support
While many affordable kits are available, researching the brand's reputation for quality and customer support can be beneficial. Brands with a strong presence in professional nail salons or with extensive online resources often provide higher-quality products and better guidance for troubleshooting. Some brands also offer individual replacement items, allowing you to replenish specific gels or tools without buying an entire new kit. Looking into "gel nail kit rankings" or "recommended popular brands" from nail professionals or experienced self-nail enthusiasts can also provide valuable recommendations, as noted by Unknown Beauty Place (translated from Japanese, https://unknownbeautyplace.com/nail/1830/). Ultimately, the best kit for you will balance essential tools, ease of use, safety features, and overall value, setting you up for a successful and enjoyable self-gel nail experience.
Can 100-Yen Store Gel Nails Be Used by Beginners?
Yes, 100-yen store gel nails are an excellent starting point for beginners interested in self-gel manicures. These affordable options from popular Japanese chains like Seria, CanDo, and Daiso have made gel nails accessible to a wider audience, allowing individuals to experiment with the technique without a significant financial commitment. They offer a diverse range of products, including bottle-type gels with integrated brushes, which simplify the application process for newcomers.
Accessibility and Cost-Effectiveness
One of the primary advantages of 100-yen store gel nails is their incredible affordability. For just 100 yen (plus tax) per item, beginners can acquire various color gels, and sometimes even base and top gels. This low price point significantly lowers the barrier to entry for self-gel nails, making it possible to try out the hobby without investing in a costly professional kit. This cost-effectiveness allows beginners to experiment with different colors and techniques, discover their preferences, and gain confidence before potentially upgrading to more expensive, professional-grade products. Many people who are hesitant about the initial costs of gel nails find these budget-friendly options to be the perfect introduction.
Variety of Colors and Types
Japanese 100-yen stores have rapidly expanded their gel nail offerings, providing an impressive array of colors and even some specialized gels. For example, as of Fall/Winter 2022, Seria offers a remarkable 77 colors of gel nail polish (translated from Japanese, https://i-voce.jp/feed/1861396/). CanDo also boasts a wide selection, with 63 colors available, including new shades released in Winter 2023 (translated from Japanese, https://i-voce.jp/feed/1861396/). Daiso, another popular chain, features 41 colors, with new shades reviewed in 2023 (translated from Japanese, https://i-voce.jp/feed/1861396/). This extensive color palette means beginners have plenty of choices to create diverse designs, from simple single-color applications to more complex layered looks. Beyond basic colors, some stores also offer glitter gels, clear gels, and even some basic art tools. This variety allows for creative expression even on a budget.
Beginner-Friendly Bottle-Type Gels
A key feature of many 100-yen store gel polishes is their bottle-type packaging, which comes with an applicator brush attached to the cap. This design mimics traditional nail polish, making the application process intuitive and familiar for beginners. You don't need to purchase separate brushes or learn how to manage pot-type gels, which require more precision and brush cleaning. This "manicure-like" application makes the transition to gel nails smoother for those accustomed to regular polish. The convenience of having the brush integrated also streamlines the setup, as you can simply open the bottle and start painting.
Limitations for Advanced Art
While 100-yen store gels are excellent for basic applications and learning the ropes, they do have some limitations, particularly for advanced nail art. The brushes included in bottle-type gels are typically standard sizes and shapes, which may not be suitable for intricate details, fine lines, or complex patterns. For more sophisticated art, using separate, specialized nail brushes with pot-type gels offers greater control and versatility. The consistency of some 100-yen gels might also be less suited for advanced techniques like detailed layering or creating three-dimensional effects, compared to professional-grade gels. However, for single-color applications, simple designs, or as practice gels, they perform remarkably well.
Considerations for Curing and Durability
It's important to note that while 100-yen store gels are affordable, they still require a UV or LED lamp to cure. Beginners will need to purchase a compatible light separately, though many affordable mini-lamps are also available online or in other budget-friendly stores. The durability of 100-yen gels can sometimes vary compared to higher-end brands, but with proper nail preparation and application techniques, many users report satisfactory longevity. As MAINEE, a salon owner and YouTuber, emphasizes, "Self-gel nails allow you to change them whenever you like. By practicing proper pre-treatment (preparation) and application methods, you can achieve salon-level durability" (translated from Japanese, https://i-voce.jp/feed/1861396/). This statement holds true even for budget-friendly gels; good technique is often more important than the price of the product itself. Therefore, 100-yen store gels are a fantastic, low-risk way for beginners to dive into the world of Japanese self-gel nails.
How to Make Your Gel Nails Last Longer
Achieving long-lasting gel nails at home is not just about the quality of the products you use, but primarily about meticulous preparation and precise application techniques. Even with beginner-friendly kits, adhering to best practices can significantly extend the life of your manicure, allowing it to last the full 3-4 weeks that gel nails are known for. Preventing common issues like lifting, chipping, and dullness relies on understanding and executing each step correctly. For more details, see VOCE's beginner self-gel nail guide by Mainee.
The Importance of Thorough Preparation
The foundation of a durable gel manicure is a well-prepared nail plate. As discussed, the "preparation" (プレパレーション) stage is critical.
- Cleanliness: Always start with thoroughly sanitized hands and nails. Any residual oils, lotions, or dust particles on the nail surface will act as a barrier, preventing the base gel from adhering properly. Use ethanol on a lint-free wipe to ensure the nail plate is pristine.
- Cuticle Care: Gently push back and remove any non-living cuticle tissue from the nail plate. Gel should never be applied directly onto the cuticle or skin, as this is a primary cause of lifting. If gel touches the skin, it creates a weak point where moisture and air can seep under the gel, leading to premature peeling.
- Buffing: Lightly buffing the nail surface with a fine-grit sponge buffer creates microscopic grooves that help the gel "grip" the nail. This is not about thinning the nail, but about providing a texture for adhesion. Over-buffing, however, can weaken the nail, so a gentle touch is key.
- Dehydration: For those prone to oily nails, a nail dehydrator or primer can further remove moisture and oil, creating an optimal surface for bonding. This step is a strong recommendation for maximizing longevity.
Thin and Even Layers
One of the most common mistakes beginners make is applying gel too thickly.
- Thin Coats are Key: Each layer of gel—base, color, and top—should be applied in very thin, even coats. Thick layers may not cure completely, leading to a soft, gummy, or wrinkled finish that is prone to chipping and lifting. Uncured gel can also cause allergic reactions.
- Multiple Thin Coats vs. One Thick Coat: It's always better to apply two or three thin coats of color gel, curing each one fully, than to try to achieve full opacity with a single thick coat. Thin layers cure more thoroughly and bond better to the previous layer.
- Consistency: Aim for consistent coverage across the entire nail plate, ensuring the gel is evenly distributed from side to side and from cuticle to free edge.
Proper Curing
The curing lamp is your gel nails' best friend. Under-curing is a major culprit for poor adhesion and durability.
- Follow Manufacturer Instructions: Always adhere to the recommended curing times for each specific gel product (base, color, top) and your lamp type (UV or LED). Curing times can vary significantly between brands and lamp wattages.
- Full Curing: Ensure your entire hand (or individual fingers, if using a smaller lamp) is positioned correctly under the light so that all nails receive adequate exposure. Sometimes, the thumbs require separate curing to ensure they are fully exposed to the light.
- Don't Rush: While gel nails cure quickly, resist the urge to pull your hand out prematurely. A few extra seconds of curing is always better than under-curing, which can result in a tacky, easily damaged, or dull finish.
Capping the Free Edge
"Capping" the free edge of the nail is a simple yet highly effective technique for preventing chips and lifting at the nail tip.
- Sealing the Tip: When applying each layer of gel (base, color, and especially top coat), use your brush to drag a thin line of gel along the very tip of your nail. This "caps" the free edge, sealing the layers together and creating a protective barrier against daily wear and tear.
- Preventing Peeling: Without capping, the exposed edge of the gel is vulnerable to snagging and peeling, which can quickly lead to the breakdown of the entire manicure.
Post-Application Care
Even after the gel is cured, a little care goes a long way.
- Cuticle Oil: Regularly apply cuticle oil to keep your cuticles and the surrounding skin hydrated. Healthy, moisturized skin around the nail contributes to overall nail health and can help prevent the gel from lifting due due to dry, brittle nails.
- Avoid Harsh Chemicals: When doing household chores or tasks involving harsh chemicals, wear gloves to protect your gel manicure and your skin.
- No Picking or Peeling: Never pick, peel, or forcibly remove your gel nails. This can severely damage your natural nail plate. When it's time for removal, always follow the proper soak-off method.
By diligently following these steps—from meticulous preparation to careful application and proper aftercare—you can significantly enhance the longevity and beauty of your at-home Japanese gel manicures, achieving salon-quality results that last for weeks.
How to Choose the Right Gel Nail Kit?
Choosing the right gel nail kit is a critical first step for beginners, as it directly impacts ease of use, safety, and the quality of your results. With many options available, focusing on key features like light compatibility, ingredient safety, and value will help you make an informed decision. Look for kits that include both UV/LED lights, as most beginner products are now compatible with both, offering greater versatility and ensuring your gels will cure properly.
Understanding UV/LED Light Compatibility
The curing light is arguably the most important piece of equipment in a gel nail kit. Gels are formulated to cure under either UV (ultraviolet) light, LED (light-emitting diode) light, or both.
- UV Lights: These lights use fluorescent bulbs that emit a broad spectrum of UV wavelengths. They can cure almost any type of gel, but the bulbs need to be replaced periodically (typically every 6-12 months), and curing times can be longer (around 2 minutes per layer).
- LED Lights: These lights use LED diodes and emit a narrower, more intense spectrum of light. They cure LED-specific gels much faster (often 30-60 seconds per layer) and the bulbs typically last for tens of thousands of hours, meaning they rarely need replacement. However, they cannot cure all UV-only gels.
- UV/LED Dual Lights: The most recommended option for beginners are lights that are compatible with both UV and LED gels. These dual-spectrum lights combine the benefits of both technologies, allowing you to cure a wider range of gel products without worrying about compatibility. Many modern beginner kits include these versatile lights, ensuring that any gel you purchase, whether it's a UV-only or LED-only formula, will cure effectively. This flexibility is particularly useful as you explore different brands and types of gel polishes.
Prioritizing Nail and Skin Health
When selecting a kit, consider brands that emphasize "nail and skin friendliness." Some brands formulate their gels and related products with ingredients that are less harsh on natural nails and the surrounding skin. For example, Cirila (シリラ) offers a "next-generation gel nail kit" where all items are developed with "kindness to nails and skin" as a core principle (translated from Japanese, https://cirila.jp/gelnailkit/?srsltid=AfmBOoqLqEo_XZGfd0gSM0xpk9M2PM1XQaFsONHBfhM03V2YjVSh6XS). Such kits often include base and top gels designed to minimize damage, and removers that are less dehydrating. This focus on gentle formulations can be particularly beneficial for beginners who are still learning proper application and removal techniques, reducing the risk of nail damage or irritation. Checking reviews and product descriptions for terms like "non-toxic," "low-acid," or "gentle formula" can help guide your choice toward healthier options.
Evaluating Kit Contents and Value
Gel nail kits vary widely in what they include. A typical starter kit should contain:
- A UV/LED curing lamp.
- Base gel.
- Top gel (preferably a non-wipe type for convenience, or a wipe-off type if you prefer less heat).
- One or more color gels.
- Essential preparation tools like an emery board, buffer, and cuticle pusher.
- Gel cleanser and cotton pads.
- Sometimes, additional items like cuticle oil or nail art tools.
Starter kits are often a cost-effective way to acquire multiple essential items at once. For instance, Cirila gel nail kits are available with varying numbers of color gels: a kit with 1 color costs 12,680 yen, a kit with 2 colors costs 13,980 yen, and a kit with 3 colors costs 14,980 yen (translated from Japanese, https://cirila.jp/gelnailkit/?srsltid=AfmBOoqLqEo_XZGfd0gSM0xpk9M2PM1XQaFsONHBfhM03V2YjVSh6XS). When evaluating value, consider not just the price, but also the quality of the included items and whether the color gels match your personal preferences. Some kits might include colors you don't like, making them less valuable despite a lower price point. It's also wise to check if the kit gels are soft gels, which are generally easier for beginners to work with compared to hard gels due to their lower viscosity and easier removal. Reading reviews from other beginners can provide insight into the user-friendliness and overall satisfaction with a particular kit.
Considering Brand Reputation and Support
While many affordable kits are available, researching the brand's reputation for quality and customer support can be beneficial. Brands with a strong presence in professional nail salons or with extensive online resources often provide higher-quality products and better guidance for troubleshooting. Some brands also offer individual replacement items, allowing you to replenish specific gels or tools without buying an entire new kit. Looking into "gel nail kit rankings" or "recommended popular brands" from nail professionals or experienced self-nail enthusiasts can also provide valuable recommendations, as noted by Unknown Beauty Place (translated from Japanese, https://unknownbeautyplace.com/nail/1830/). Ultimately, the best kit for you will balance essential tools, ease of use, safety features, and overall value, setting you up for a successful and enjoyable self-gel nail experience.
Can 100-Yen Store Gel Nails Be Used by Beginners?
Yes, 100-yen store gel nails are an excellent starting point for beginners interested in self-gel manicures. These affordable options from popular Japanese chains like Seria, CanDo, and Daiso have made gel nails accessible to a wider audience, allowing individuals to experiment with the technique without a significant financial commitment. They offer a diverse range of products, including bottle-type gels with integrated brushes, which simplify the application process for newcomers.
Accessibility and Cost-Effectiveness
One of the primary advantages of 100-yen store gel nails is their incredible affordability. For just 100 yen (plus tax) per item, beginners can acquire various color gels, and sometimes even base and top gels. This low price point significantly lowers the barrier to entry for self-gel nails, making it possible to try out the hobby without investing in a costly professional kit. This cost-effectiveness allows beginners to experiment with different colors and techniques, discover their preferences, and gain confidence before potentially upgrading to more expensive, professional-grade products. Many people who are hesitant about the initial costs of gel nails find these budget-friendly options to be the perfect introduction.
Variety of Colors and Types
Japanese 100-yen stores have rapidly expanded their gel nail offerings, providing an impressive array of colors and even some specialized gels. For example, as of Fall/Winter 2022, Seria offers a remarkable 77 colors of gel nail polish (translated from Japanese, https://i-voce.jp/feed/1861396/). CanDo also boasts a wide selection, with 63 colors available, including new shades released in Winter 2023 (translated from Japanese, https://i-voce.jp/feed/1861396/). Daiso, another popular chain, features 41 colors, with new shades reviewed in 2023 (translated from Japanese, https://i-voce.jp/feed/1861396/). This extensive color palette means beginners have plenty of choices to create diverse designs, from simple single-color applications to more complex layered looks. Beyond basic colors, some stores also offer glitter gels, clear gels, and even some basic art tools. This variety allows for creative expression even on a budget.
Beginner-Friendly Bottle-Type Gels
A key feature of many 100-yen store gel polishes is their bottle-type packaging, which comes with an applicator brush attached to the cap. This design mimics traditional nail polish, making the application process intuitive and familiar for beginners. You don't need to purchase separate brushes or learn how to manage pot-type gels, which require more precision and brush cleaning. This "manicure-like" application makes the transition to gel nails smoother for those accustomed to regular polish. The convenience of having the brush integrated also streamlines the setup, as you can simply open the bottle and start painting.
Limitations for Advanced Art
While 100-yen store gels are excellent for basic applications and learning the ropes, they do have some limitations, particularly for advanced nail art. The brushes included in bottle-type gels are typically standard sizes and shapes, which may not be suitable for intricate details, fine lines, or complex patterns. For more sophisticated art, using separate, specialized nail brushes with pot-type gels offers greater control and versatility. The consistency of some 100-yen gels might also be less suited for advanced techniques like detailed layering or creating three-dimensional effects, compared to professional-grade gels. However, for single-color applications, simple designs, or as practice gels, they perform remarkably well.
Considerations for Curing and Durability
It's important to note that while 100-yen store gels are affordable, they still require a UV or LED lamp to cure. Beginners will need to purchase a compatible light separately, though many affordable mini-lamps are also available online or in other budget-friendly stores. The durability of 100-yen gels can sometimes vary compared to higher-end brands, but with proper nail preparation and application techniques, many users report satisfactory longevity. As MAINEE, a salon owner and YouTuber, emphasizes, "Self-gel nails allow you to change them whenever you like. By practicing proper pre-treatment (preparation) and application methods, you can achieve salon-level durability" (translated from Japanese, https://i-voce.jp/feed/1861396/). This statement holds true even for budget-friendly gels; good technique is often more important than the price of the product itself. Therefore, 100-yen store gels are a fantastic, low-risk way for beginners to dive into the world of Japanese self-gel nails.
Frequently Asked Questions
How long do self-gel nails usually last?
With proper preparation and application, self-gel nails can typically last for 3 to 4 weeks. This is significantly longer than traditional manicures, which often chip within 2 to 3 days and rarely last beyond 1 week, as indicated by Cin-Cia nail school (translated from Japanese, https://cin-cia.com/jelnail-yarikata/). The longevity depends heavily on thorough nail preparation, applying thin and even coats, and ensuring each layer is fully cured under a UV/LED light.
Is it difficult for beginners to do gel nails at home?
While self-gel nails require more tools and steps than a regular manicure, it is not overly difficult for beginners. "If you follow the correct procedures and tips, even beginners can achieve a beautiful finish that lasts 2-3 weeks. Even if you think you're clumsy, you should be able to do it by following the steps," states Watts Online (translated from Japanese, https://watts-online.jp/blogs/column/gel-nails-turorial?srsltid=AfmBOoq5OKZtT2QK5haDbRaJQbaJMhOQlkJoY7PykNxOG1Ylh1Z4u9tk). Many essential tools can be substituted with household items, reducing the initial cost barrier, and 100-yen stores offer beginner-friendly bottle-type gels.
What are the most common mistakes beginners make with self-gel nails?
Beginners often make mistakes like inadequate nail preparation, applying gel too thickly, and under-curing. Failing to properly clean and dehydrate the nail plate, or allowing gel to touch the cuticles, can lead to premature lifting. Thick gel layers may not cure completely, resulting in a soft finish that chips easily. Not curing each layer for the recommended time also compromises durability. The application process alone typically takes 60-90 minutes, so rushing can lead to these common issues (translated from Japanese, https://cin-cia.com/jelnail-yarikata/).
Can I use regular nail polish over gel nails?
While it is technically possible to apply regular nail polish over cured gel nails, it is generally not recommended. The primary benefit of gel nails is their long-lasting color and shine, which can be diminished by adding a layer of regular polish. If you do apply regular polish, you'll need to use non-acetone nail polish remover to take it off, as acetone can damage the gel layer underneath. However, this negates some of the convenience and durability benefits of gel.
How do I remove gel nails safely at home?
Removing gel nails safely at home requires soaking them off with a specialized gel nail remover (acetone-based) rather than peeling or filing them off. First, gently file off the top layer of the gel to break the seal. Then, soak cotton pads in gel remover, place them on each nail, and wrap your fingertips tightly with aluminum foil or use gel removal clips. Allow them to soak for 10-15 minutes, as noted by Watts Online (translated from Japanese, https://watts-online.jp/blogs/column/gel-nails-turorial?srsltid=AfmBOoq5OKZtT2QK5haDbRaJQbaJMhOQlkJoY7PykNxOG1Ylh1Z4u9tk). Gently push off the softened gel with a wood stick, being careful not to scrape your natural nail. Repeat soaking if necessary, and finish by moisturizing your nails and cuticles with oil.
Sources
- https://lalamaru.jp/beautycolumn/nail/selfgelnail-basic-method?srsltid=AfmBOorusCOE0OgtZ0Rm1FxkAi1erzcB9mghzJN2FHFWOywRLDh9xwUV
- https://cin-cia.com/jelnail-yarikata/
- https://watts-online.jp/blogs/column/gel-nails-turorial?srsltid=AfmBOoq5OKZtT2QK5haDbRaJQbaJMhOQlkJoY7PykNxOG1Ylh1Z4u9tk
- https://i-voce.jp/feed/1861396/
- https://item.rakuten.co.jp/petitprice/c/0000000267/
- https://cirila.jp/gelnailkit/?srsltid=AfmBOoqLqEo_XZGfd0gSM0xpk9M2PM1XQaFsONHBfhM03V2YjVSh6XS
- https://detail.chiebukuro.yahoo.co.jp/qa/question_detail/q13304962643
- https://unknownbeautyplace.com/nail/1830/
Related Reading
- Best Japanese Nail Tools for Beginners
- How to Do Japanese Mirror Nails: The Complete Guide
- How to Remove Japanese Gel Nails at Home
- Japanese Pro Nail Tools: The Complete Supply Guide
- The Best Japanese Nail Tools for Beginners: A Translated Guide
— The Nail Atlas Team