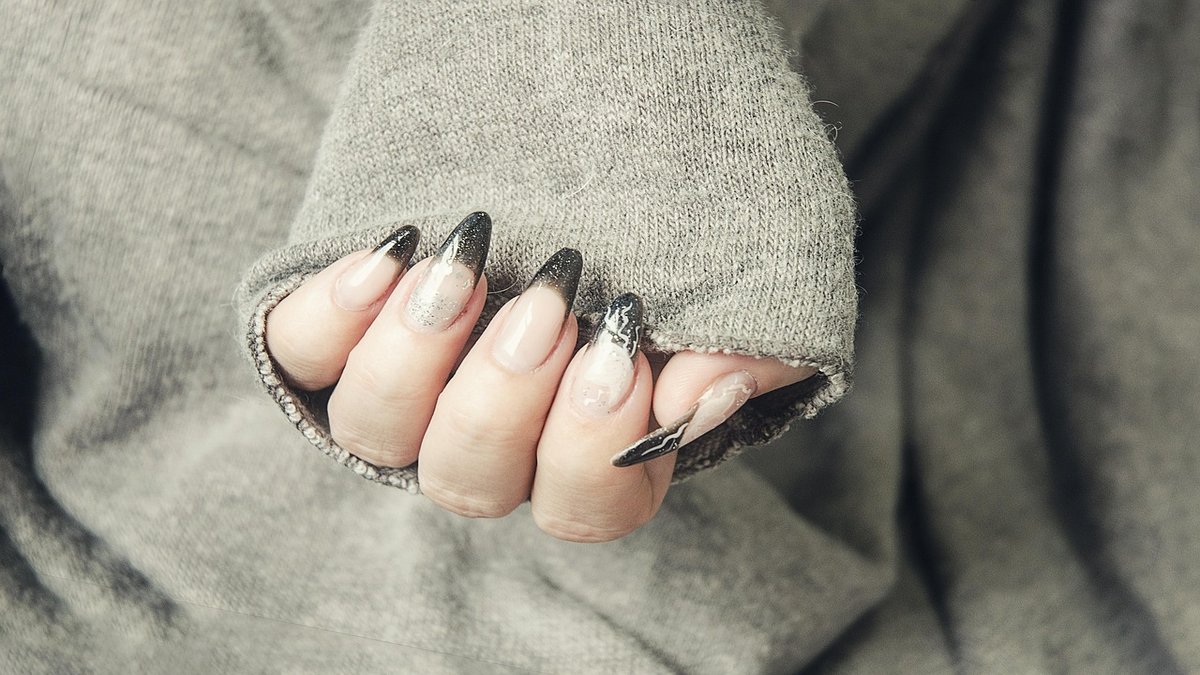
How to Store Japanese Gel Polishes Correctly
- Gel polish hardens under UV/LED light in 15-30 seconds, unlike traditional polish which takes 15-30 minutes to dry and half a day to fully cure (cin-cia.com).
Last updated: April 2026
Affiliate Disclosure: We may earn a commission when you purchase through our links. This does not affect our editorial independence.
Quick Answer
- Gel polish hardens under UV/LED light in 15-30 seconds, unlike traditional polish which takes 15-30 minutes to dry and half a day to fully cure (cin-cia.com).
- Gel nails last 3-4 weeks, significantly longer than traditional manicures which typically last 3-7 days (cin-cia.com).
- Self-gel nail kits can save over 100,000 yen annually compared to salon visits (watts-online.jp).
- Proper storage helps prevent premature curing and maintains polish consistency, ensuring your investment in products from brands like Seria, CanDo, and Daiso lasts longer.
Storing Japanese gel polishes correctly is crucial for maintaining their quality and extending their shelf life. Unlike traditional nail polish that air-dries, gel polish hardens through a chemical reaction when exposed to UV or LED light, a process that takes only 15-30 seconds compared to the 15-30 minutes required for regular polish to dry and half a day to fully cure (cin-cia.com). This unique curing mechanism means gel polishes are highly sensitive to light and air. Improper storage can lead to premature hardening, changes in consistency, and diminished color vibrancy, rendering your expensive products unusable. By understanding the specific needs of gel polishes and implementing simple storage practices, you can protect your investment, ensure consistent results, and enjoy the long-lasting beauty of gel nails, which can endure for 3-4 weeks on average (watts-online.jp).
What Are Japanese Gel Polishes and How Do They Differ from Regular Polish?
Japanese gel polishes are a type of nail cosmetic made from synthetic resin that hardens when exposed to ultraviolet (UV) or light-emitting diode (LED) light. This hardening process, known as curing, is a key characteristic that sets them apart from traditional nail polishes. Gel nails are widely supported across various age groups in Japan because they allow for more elaborate and vibrant nail art designs compared to conventional manicures (cin-cia.com). The unique chemistry of gel polish provides several advantages in terms of application, durability, and artistic potential.
The Curing Process: Light vs. Air Drying
The fundamental difference between gel polish and traditional nail polish lies in their hardening method. Traditional nail polish dries through natural air exposure, where solvents evaporate, leaving behind a hard film. This process can take a significant amount of time; each layer requires about 15-30 minutes to dry, and it can take up to half a day for the polish to fully harden (cin-cia.com). This extended drying time makes it challenging to create intricate designs without smudging or damaging the wet layers.
In contrast, gel polish undergoes a chemical reaction when exposed to UV or LED light, causing the resin to polymerize and harden rapidly. This light-induced curing process is remarkably quick, with complete hardening occurring in just 30-60 seconds under a UV/LED light (cin-cia.com). The speed of curing allows for immediate layering of colors and designs without the risk of smudging, making complex nail art much more accessible for both professionals and self-nail enthusiasts. The rapid hardening means you can move on to the next step of your manicure or your daily activities almost immediately after curing, eliminating the long waiting times associated with traditional polish.
Durability and Longevity
Another significant advantage of Japanese gel polishes is their superior durability and longevity. While traditional manicures typically last for a maximum of 1 week to 10 days, and often chip or peel within 2-3 days, gel nails offer a much longer wear time. Gel polish is known to last for approximately 3-4 weeks, maintaining its vibrant color and glossy finish throughout this period (cin-cia.com, watts-online.jp). This extended wear makes gel nails a popular choice for those who desire long-lasting beauty without frequent touch-ups or reapplications. The resilient nature of cured gel also provides a protective layer over the natural nail, which can help prevent breakage and promote nail growth.
The ability of gel polish to resist chipping, peeling, and dulling for several weeks is a major draw for many users. This durability is due to the strong, flexible, and non-porous layer formed after curing, which is more resistant to daily wear and tear than air-dried traditional polish.
Artistic Freedom and Design Potential
The rapid curing of gel polish also unlocks a vast array of artistic possibilities that are difficult to achieve with traditional nail polish. Because each layer of gel hardens instantly, artists can build complex designs, intricate patterns, and three-dimensional elements without worrying about colors bleeding into each other or designs getting smudged. The "tackiness" of uncured gel allows for precise placement of glitter, rhinestones, and other embellishments before the final cure.
Traditional polish, with its slow drying time, limits the complexity of designs, as multiple wet layers can easily mix or get ruined. Gel polish, however, allows for a wide range of artistic expressions, from subtle gradients and delicate lines to bold abstract art and detailed character designs. This versatility is one of the primary reasons why gel nails are so beloved in the Japanese nail art scene, known for its creativity and precision.
Removal Process
While gel nails offer superior longevity, their removal process is more involved than that of traditional polish. Regular nail polish can be easily removed with a standard nail polish remover (acetone or non-acetone). Gel polish, however, requires a dedicated soak-off method using a specialized remover, typically acetone-based, which can take 10-15 minutes (watts-online.jp). This process usually involves filing down the top layer of the gel, soaking the nails in acetone-soaked cotton wraps, and gently pushing off the softened gel with a cuticle pusher. This step, though longer than traditional polish removal, is essential to protect the natural nail underneath.
In summary, Japanese gel polishes offer a durable, long-lasting, and artistically versatile alternative to traditional nail polish, primarily due to their light-activated curing process. While they require a specific removal method and a slightly larger initial investment in tools, the benefits of extended wear and creative freedom make them a highly popular choice for self-nail enthusiasts and salon clients alike.
Why is Correct Storage Important for Japanese Gel Polishes?
Correct storage is critically important for Japanese gel polishes because their unique light-curing properties make them highly susceptible to premature hardening and degradation. Unlike traditional nail polishes that dry by solvent evaporation, gel polishes contain photoinitiators that react to UV or LED light, causing the liquid resin to solidify. This means that any exposure to light, heat, or air can compromise the product's integrity, leading to wasted product and inconsistent results. Understanding and implementing proper storage techniques is essential for maximizing the lifespan and performance of your gel polish collection.
Preventing Premature Curing
The primary reason for proper storage is to prevent premature curing of the gel polish. Gel polishes are designed to harden only under specific wavelengths of UV or LED light emitted by a curing lamp. However, they can also react to ambient light, especially direct sunlight, which contains UV rays. Even indirect sunlight or bright indoor lighting over prolonged periods can trigger the photoinitiators in the gel, causing it to thicken, clump, or even harden inside the bottle or container.
When gel polish prematurely cures, its consistency changes, making it difficult or impossible to apply smoothly. It might become stringy, grainy, or develop hard lumps, rendering it unusable. This is particularly true for clear gels like base and top coats, which are often more sensitive to light exposure. Storing polishes in opaque containers or dark environments shields them from unwanted light, preserving their liquid state until they are intentionally cured during application.
Maintaining Optimal Consistency and Performance
Beyond preventing hardening, correct storage helps maintain the optimal consistency and performance of the gel polish. Gel polishes are formulated with a specific viscosity to ensure smooth, even application and proper self-leveling on the nail. Exposure to extreme temperatures, especially heat, can alter this viscosity. High temperatures can cause the gel to thin out, making it runny and difficult to control, leading to messy applications and potential flooding of the cuticles. Conversely, very cold temperatures can make the gel too thick, causing it to drag and leaving uneven streaks on the nail.
Fluctuations in temperature can also affect the chemical stability of the gel, potentially reducing its adhesion properties or causing the pigments to separate. When a gel polish separates, the color pigments might settle at the bottom, requiring extensive stirring or shaking to recombine, which can introduce air bubbles. Consistent storage conditions, away from extreme heat or cold, ensure that the gel maintains its intended texture and chemical composition, leading to a flawless application and durable finish.
Preserving Color Vibrancy and Shine
The vibrant colors and high-gloss finish are hallmarks of Japanese gel nails. Improper storage, particularly prolonged exposure to light, can degrade the pigments in colored gels, leading to dullness, discoloration, or fading over time. UV light can break down the chemical bonds of the colorants, causing them to lose their intensity. This means that a beautifully rich red might turn into a muted, oxidized shade, or a bright pastel could become washed out.
Similarly, the high-shine property of top gels can be compromised if the product is not stored correctly. If a top gel thickens or hardens prematurely, it may not apply as smoothly, resulting in a less glossy or even streaky finish. By protecting polishes from light and maintaining stable temperatures, you ensure that the colors remain true to their original shade and that the top coat delivers the desired brilliant shine, making your nail art look professional and fresh for the entire 3-4 weeks it lasts on the nails (cin-cia.com).
Preventing Contamination and Product Waste
A tightly sealed bottle is as important as light protection. If a gel polish bottle is not sealed properly, air can enter, leading to oxidation and thickening of the product. Air exposure can also introduce moisture, which can alter the gel's chemistry and potentially foster bacterial growth, especially if the product is used in a non-sterile environment. Additionally, dust, debris, or other contaminants can enter an unsealed bottle, compromising the purity and performance of the gel.
Wasting gel polish due to improper storage can be costly. Gel nail supplies, while offering significant savings compared to salon visits (over 100,000 yen annually, according to watts-online.jp), still represent an investment. A basic set of gel nail tools can include up to 15 items (watts-online.jp). Having to discard a partially used bottle because it has prematurely hardened or become contaminated means losing money and potentially delaying your nail art projects. Proper sealing and cleanliness during and after use significantly extend the functional life of your products.
In conclusion, correct storage of Japanese gel polishes is not merely a recommendation; it is a necessity for preserving their chemical integrity, aesthetic qualities, and economic value. By diligently protecting your gels from light, extreme temperatures, and air, you ensure that each bottle performs as intended, allowing you to create beautiful, long-lasting nail art every time.
What are the Essential Tools for Self-Gel Nails?
Embarking on the journey of self-gel nails requires a specific set of tools and products that differ from those used for traditional manicures. While the initial list of items may seem extensive, many can be substituted with common household items, helping to keep initial costs down. According to Gel Nail Application Guide for Beginners, understanding the purpose of each tool and choosing the right type of gel is crucial for achieving salon-quality results at home. A basic set of gel nail tools can include up to 15 items, encompassing everything from preparation to finishing touches (watts-online.jp).
Preparation and Nail Care Tools (Prep/Pre-treatment)
Before applying any gel, proper nail preparation, often called "prep" or "pre-treatment," is essential for ensuring adhesion and longevity. Some of these items can be easily substituted:
Wipe (ワイプ)
Used for removing oil, moisture, and dust from the nail surface before gel application, and for wiping off the uncured gel layer after curing the top coat.
- Substitution: Kitchen paper with low lint can be used as an alternative (cin-cia.com). Cotton pads with minimal fuzz are also acceptable.
Cuticle Pusher (キューティクルプッシャー)
Used to gently push back the cuticles from the nail plate, creating a clean canvas for gel application and preventing lifting.
- Substitution: A wooden stick (ウッドスティック) wrapped with a small amount of cotton can serve the same purpose (cin-cia.com).
Finger Bowl (フィンガーボウル)
A small bowl used for soaking fingers, typically to soften cuticles.
- Substitution: Any small basin or even a clean sink can be used (cin-cia.com).
Cuticle Remover (キューティクルリムーバー)
A liquid solution designed to soften and dissolve dead cuticle skin, making it easier to remove.
- Substitution: Warm water can be used as a simple alternative to soften cuticles if a dedicated remover is unavailable (cin-cia.com).
Emery Board (エメリーボード) and Sponge Buffer (スポンジバッファー)
These files are used to shape the nails and gently buff the nail surface to create a slight texture, which helps the gel adhere better.
- Recommendation: For beginners, choose fine-grit files to avoid over-filing and damaging the natural nail (cin-cia.com).
Dust Brush (ダストブラシ)
Used to brush away any dust created from filing the nails.
- Recommendation: While not strictly essential, it helps ensure a clean surface.
Disinfectant Ethanol (消毒用エタノール)
For sanitizing fingers and removing any lingering oils or moisture from the nail plate.
- Recommendation: A crucial step for hygiene and gel adhesion.
Gel Application Tools (Coloring)
Once the nails are prepped, these tools are used for applying the gel layers:
Base Gel (ベースジェル)
This is the first layer applied directly to the natural nail. Its purpose is to enhance the adhesion between the natural nail and the colored gel, preventing lifting and extending wear time.
- Recommendation: For beginners, soft gel types are recommended over high-viscosity hard gels, as they are easier to handle (cin-cia.com).
Color Gel (カラージェル)
These gels provide the desired color and design.
- Recommendation: For a single-color application, one shade is sufficient. For nail art, multiple colors will be needed (cin-cia.com. Japanese 100-yen stores offer a wide range of affordable options; for example, Seria offered 77 colors in 2022, CanDo had 63 colors in 2023, and Daiso featured 41 colors in 2023 (i-voce.jp).
Top Gel (トップジェル)
The final layer applied over the color gel. It provides a glossy finish, protects the color, and adds durability.
- Types: "Non-wipe" top gels do not require wiping after curing, while "wipe-needed" types leave a sticky uncured layer that must be wiped off.
- Recommendation: Beginners might find "wipe-needed" types easier to control as they tend to generate less heat during curing (cin-cia.com).
Nail Brush (ネイルブラシ)
Essential for applying gel, especially for container-type gels.
- Types:
- Round brushes (ラウンド筆): Ideal for painting along the curve of the cuticle line (cin-cia.com).
- Square brushes (スクエア筆): Suitable for larger nail plates.
- Short round brushes (ショートラウンド筆): Best for smaller nails.
- Art brushes (アート筆): Fine-tipped brushes are needed for intricate designs and detailing (cin-cia.com).
UV/LED Light (UV/LEDライト)
This lamp is crucial for curing (hardening) the gel polish.
- Types: UV lights, LED lights, or hybrid UV/LED lights.
- Recommendation: Ensure the lamp is compatible with the type of gel polish you are using. Modern beginner-friendly lamps often support both UV and LED gels (cin-cia.com).
Kitchen Paper (キッチンペーパー)
Used to wipe excess gel from nail brushes when changing colors or cleaning.
- Recommendation: Always clean brushes thoroughly between different gel colors to prevent contamination and maintain brush quality (cin-cia.com).
Gel Polish Types: Bottle vs. Container
Gel polish generally comes in two main formats:
- Bottle Type (ボトルタイプ): These resemble traditional nail polish bottles and often come with an attached brush. They are commonly found in 100-yen stores and are easy for beginners to use, as they apply like regular nail polish (cin-cia.com).
- Container Type (コンテナタイプ): These gels come in small pots or jars and require separate nail brushes for application. While they might seem less convenient initially, they are preferred for intricate nail art because they allow for more precise control and the use of specialized art brushes. Using different brushes for different gels (e.g., one for base, one for color, one for art) is considered a step towards improvement for self-nail artists (cin-cia.com).
Equipping yourself with these essential tools and understanding their functions will set you up for success in your self-gel nail journey, allowing you to create beautiful, long-lasting manicures at home.
How Do I Store Gel Polishes to Prevent Hardening?
Storing gel polishes correctly is crucial to prevent premature hardening and maintain their usability. The key principle is to protect them from any form of light, heat, and air exposure. Gel polishes are designed to cure under specific UV or LED wavelengths, but they are also sensitive to ambient light, which can gradually trigger the hardening process even when not under a dedicated curing lamp. By following a few simple guidelines, you can significantly extend the life of your gel polishes and ensure they remain in perfect condition for future use.
Shield from Direct and Indirect Light
The most critical step in preventing gel polish hardening is to keep it away from all light sources. This includes direct sunlight, indirect sunlight coming through windows, and even bright artificial room lighting. Sunlight, in particular, contains UV rays that are strong enough to initiate the curing process in gel polish, causing it to thicken or harden inside the bottle or container.
- Opaque Storage: Always store your gel polishes in opaque containers, drawers, or closed cabinets. If your gel polish bottles are clear or translucent, consider placing them in a dark box or a dedicated nail polish organizer that blocks light.
- Away from Windows: Never leave gel polish bottles on a windowsill or near any area where they might be exposed to sunlight, even for short periods. The cumulative effect of light exposure can quickly degrade the product.
- During Use: Even during application, minimize the exposure of your open gel polish bottles to your UV/LED lamp. Cure one nail at a time and close the bottle immediately after dispensing the required amount of gel. Some professionals use a small, light-blocking cover over their open gel pots to protect them from ambient light during a manicure session.
Ensure Tight Sealing After Each Use
Air exposure is another factor that can contribute to the degradation and thickening of gel polish. While not as immediate as light exposure in causing hardening, air can introduce moisture and oxygen, which can alter the gel's chemical composition over time. More importantly, if the bottle neck or container rim has dried gel residue, it can prevent a tight seal, allowing air to continually enter.
- Wipe Bottle Necks: After each use, always take a lint-free wipe or a piece of kitchen paper soaked in alcohol or gel cleanser to thoroughly clean the neck of the bottle and the inside of the cap. This removes any sticky gel residue that could prevent a secure seal. A clean rim ensures the cap can be twisted on tightly, forming an airtight barrier.
- Secure Caps/Lids: Make sure the cap or lid is screwed on or snapped shut completely and securely. A loose cap allows air to circulate, potentially drying out the gel or allowing contaminants to enter.
- Avoid Contamination: Keep the opening of the gel polish bottle clean and free from dust or other debris. Even small particles can compromise the seal or contaminate the gel inside.
Maintain Consistent Room Temperature
Extreme temperature fluctuations can negatively impact the consistency and chemical stability of gel polishes. Both very high and very low temperatures can alter the viscosity of the gel, making it difficult to work with.
- Cool, Stable Environment: Store gel polishes in a cool, dark place with a relatively stable temperature. Avoid areas that experience significant temperature swings, such as bathrooms (due to steam and humidity), near heating vents, radiators, or air conditioning units.
- Avoid Refrigeration: While a cool environment is good, refrigerating gel polish is generally not recommended. Extreme cold can cause the gel to thicken excessively, making it difficult to apply. It can also lead to condensation inside the bottle when brought back to room temperature, introducing unwanted moisture.
- Room Temperature is Best: A consistent room temperature, typically between 18-24°C (65-75°F), is ideal for maintaining the gel's intended consistency.
Organize for Easy Access and Protection
Having an organized storage system not only makes it easier to find your desired colors but also helps in protecting your polishes.
- Dedicated Storage: Consider investing in a dedicated storage box, drawer unit, or nail polish rack that can be kept in a dark, cool place. Opaque storage containers are excellent for blocking light.
- Upright Storage: Always store gel polish bottles upright. This prevents leakage and helps keep the brush submerged in the gel, preventing it from drying out.
- Labeling: If using opaque storage, label the outside of the containers or drawers so you know what colors are inside without having to expose all your bottles to light every time you search for a shade.
By diligently following these storage tips, you can effectively prevent your Japanese gel polishes from hardening prematurely. This ensures that your products remain in optimal condition, ready to deliver beautiful, long-lasting manicures whenever inspiration strikes. Remember, gel polish is a resin that hardens under UV/LED light in 15-30 seconds, so protecting it from unintended light exposure is paramount (cin-cia.com).
What is the Recommended Environment for Gel Polish Storage?
The recommended environment for storing Japanese gel polishes is a cool, dark place with stable temperatures, away from any direct or indirect light sources. This specific environment is crucial because gel polishes are light-sensitive resins that can prematurely harden or degrade if exposed to inappropriate conditions. Maintaining an optimal storage environment ensures the longevity of your products, preserves their intended consistency, and protects their vibrant colors.
The Importance of a Cool, Dark Place
The primary characteristic of an ideal storage environment for gel polishes is coolness and darkness. This directly addresses the two main vulnerabilities of gel products: light and heat.
Darkness: Shielding from Light
Gel polishes contain photoinitiators that react to UV light, causing them to cure. While dedicated UV/LED lamps are used for intentional curing, natural sunlight and even bright artificial lights contain UV wavelengths that can trigger this reaction over time.
- Preventing Premature Curing: Storing gels in a dark place, such as inside a closed cabinet, drawer, or an opaque storage box, completely blocks out these light sources. This prevents the gel from thickening, clumping, or hardening inside its container, which would render it unusable.
- Preserving Pigment Integrity: Light exposure can also cause the color pigments in gel polishes to fade or change over time. A dark storage environment helps maintain the original vibrancy and true shade of your colored gels, ensuring your nail art looks as intended.
Coolness: Maintaining Consistency
While not as critical as darkness, a cool temperature is beneficial for maintaining the optimal viscosity and chemical stability of gel polishes.
- Preventing Thinning or Thickening: Extreme heat can cause gel polishes to thin out, making them runny and difficult to control during application. Conversely, very cold temperatures can make them excessively thick, leading to streaky application. A cool room temperature (typically between 18-24°C or 65-75°F) helps the gel maintain its ideal consistency, ensuring smooth and easy application every time.
- Avoiding Separation: Consistent temperatures also help prevent the separation of pigments from the gel base, which can occur with temperature fluctuations. If separation happens, you might need to vigorously shake or stir the gel, potentially introducing air bubbles.
Ideal Storage Locations and Solutions
Considering the need for a cool, dark, and stable environment, here are some practical storage solutions:
Opaque Storage Boxes or Drawers
These are excellent choices for protecting polishes from light.
- Dedicated Boxes: Many nail artists use specialized opaque storage boxes or clear boxes with solid lids that can be stored in a closet. These boxes not only block light but also help organize your collection.
- Drawer Units: Storing gels in a dresser drawer or a dedicated drawer unit is an effective way to keep them in the dark. Ensure the drawers are not near heat sources.
Closed Cabinets or Closets
Any closed cabinet or closet that is not exposed to direct sunlight and maintains a relatively stable temperature can serve as an ideal storage spot.
- Kitchen Cabinets (with caution): While many kitchen cabinets are dark, be mindful of those near heat-generating appliances like ovens or dishwashers. A pantry or a cabinet away from heat sources could work.
- Bedroom Closets: These are often perfect, as they are typically dark and maintain a consistent room temperature.
Dedicated Nail Art Trolleys or Organizers
For those with extensive collections or who regularly do self-gel nails, a specialized nail art trolley or rolling organizer can be beneficial. Many of these units are designed with drawers or compartments that can be closed, protecting polishes from light and dust.
- Mobility and Protection: These trolleys offer the convenience of moving your supplies while keeping them protected. Look for models with opaque drawers or covers.
What to Avoid
To ensure your Japanese gel polishes last, avoid these storage mistakes:
- Windowsills: Direct sunlight is the enemy of gel polish. Never store bottles on windowsills.
- Bathrooms: While convenient, bathrooms often experience significant temperature and humidity fluctuations due to showers and baths, which are not ideal for gel polish.
- Refrigerators: Although a cool environment is desired, refrigerators are too cold and can cause gels to thicken excessively. The condensation that forms when bottles are taken out can also introduce moisture.
- Near Heat Sources: Avoid storing gels near radiators, heating vents, space heaters, or even direct sunlight on a desk.
- Open Shelves: Unless the room is consistently dark, open shelves expose gels to ambient light, increasing the risk of premature curing.
By consciously choosing a cool, dark, and stable environment for your Japanese gel polishes, you are not just storing them; you are preserving their quality, ensuring consistent performance, and protecting your investment in creating beautiful, long-lasting nail art. This attention to storage is a small effort that yields significant benefits in the overall success of your self-gel nail journey, which can last 3-4 weeks on the nail (cin-cia.com).
Are There Specific Storage Tips for Different Gel Polish Types?
Yes, while the general principles of storing Japanese gel polishes in a cool, dark, and airtight environment apply to all types, there are specific considerations for bottle-type gels versus container-type gels. Understanding these nuances ensures that each product format is optimally maintained, preventing premature hardening, contamination, and degradation. The goal is to preserve the gel's consistency and chemical integrity regardless of its packaging.
Bottle-Type Gel Polishes
Bottle-type gel polishes, commonly found in 100-yen stores and often resembling traditional nail polish bottles with an integrated brush, are popular for their ease of use. Brands like Seria, CanDo, and Daiso offer a wide range of colors in this format, with Seria offering 77 colors in 2022, CanDo 63 colors in 2023, and Daiso 41 colors in 2023 (i-voce.jp). While convenient, their design also presents specific storage considerations. For more details, see Self Gel Nail Basic Method.
Brush Stem Cleanliness:
The integrated brush is a potential point of failure if not properly managed. Gel can dry on the brush stem or around the neck of the bottle, making it difficult to close properly or contaminating the gel inside.
- Wipe Before Closing: Always wipe the brush stem with a lint-free wipe soaked in alcohol or gel cleanser before reinserting it into the bottle and closing. This removes any uncured gel that could harden on the stem or in the neck.
- Clean Bottle Neck: Pay extra attention to wiping the bottle neck and threads clean. Any gel residue left here can harden, preventing an airtight seal and potentially fusing the cap to the bottle. A tight seal is crucial to prevent air exposure, which can thicken the gel over time.
Upright Storage:
Bottle-type gels should always be stored upright.
- Prevent Leakage: Storing bottles on their side or upside down can lead to leakage, especially if the seal isn't perfectly airtight.
- Brush Submersion: Upright storage ensures the brush remains submerged in the gel, preventing it from drying out or hardening, which could make application difficult.
- Pigment Settling: While gel polishes are generally more stable than traditional polishes, upright storage can also help minimize pigment settling in some formulations, ensuring a consistent color when you next use it.
Protection from Light During Use:
Even during application, be mindful of light exposure.
- Quick Curing: Gel polishes harden very quickly under UV/LED light (15-30 seconds, according to cin-cia.com). Keep the bottle closed as much as possible, only opening it to dip the brush for each nail.
- Away from Lamp: Position open bottles and your working area away from the direct light of your UV/LED lamp. Some users even place a small, opaque barrier between their open bottles and the lamp.
Container-Type Gel Polishes
Container-type gels, which come in small pots or jars, are favored by those who prefer using separate brushes for precision and intricate nail art. This format requires slightly different storage habits.
Secure Lids are Paramount:
The most important rule for container gels is to ensure the lid is securely fastened after every use.
- Prevent Drying Out: Unlike bottle gels where the brush is submerged, container gels have a larger surface area exposed to air when open. A loose lid will allow air to dry out the gel, altering its consistency and potentially causing it to harden on the surface.
- Contamination: A loose lid also makes the gel vulnerable to dust, lint, and other airborne contaminants that can fall into the pot, compromising the product's purity.
- Wipe Edges: Just like bottle necks, wipe the rim and inside of the lid of container gels with a lint-free wipe and alcohol/cleanser to remove any sticky residue. This ensures a clean, tight seal when the lid is replaced.
Dedicated Brushes:
For container gels, using separate brushes for different types of gels (e.g., one for base, one for color, one for top, and fine brushes for art) is considered a best practice for self-nail artists (cin-cia.com).
- Clean Brushes Thoroughly: After each use, clean your gel brushes thoroughly with a gel cleanser or alcohol, wiping them on a kitchen paper to remove all traces of gel (cin-cia.com). Store brushes flat or upright in a way that protects the bristles from dust and light. Never cure gel onto your brushes.
Minimize Open Time:
Container gels have a larger opening, meaning more of the product is exposed to light and air when open.
- Dispense Small Amounts: If you are working with a specific color, you might consider scooping a small amount onto a mixing palette or foil before starting your application. This minimizes the time the main container is open and exposed.
- Close Immediately: Always close the lid of the container gel immediately after taking out the amount you need.
General Tips Applicable to Both Types
- Cool, Dark Storage: Both bottle and container gels benefit from being stored in a cool, dark place, away from direct sunlight, windows, and heat sources.
- Stable Temperature: Avoid areas with extreme temperature fluctuations to maintain consistent viscosity.
- Organization: Keep your gels organized in opaque boxes or drawers to protect them from ambient light and make them easy to find.
By paying attention to these specific storage tips for both bottle-type and container-type Japanese gel polishes, you can ensure that your entire collection remains in prime condition. This careful approach not only extends the life of your products but also contributes to consistently beautiful and long-lasting gel manicures, which can typically last 3-4 weeks (watts-online.jp).
Can Self-Gel Nails Save Money and Time?
Yes, self-gel nails can significantly save both money and time compared to regularly visiting a professional nail salon. While the initial investment in a gel nail kit and supplies might seem substantial, the long-term financial and time benefits are considerable. This makes self-gel nails an increasingly popular choice for those who want to enjoy beautiful, durable manicures without the ongoing expenses and scheduling constraints of salon appointments. According to Gel Nail Kit Selection Guide 2026, many people are looking for ways to enjoy gel nails at home.
Significant Cost Savings
One of the most compelling reasons to switch to self-gel nails is the potential for substantial cost savings. Regular visits to a nail salon for gel manicures can quickly add up.
Annual Savings:
According to watts-online.jp, salon visits for gel nails can cost over 100,000 yen annually. This figure often includes the cost of application, removal, and any additional art or treatments. By doing your own gel nails at home, you eliminate these recurring salon fees.
Initial Investment vs. Long-Term Cost:
While you need to purchase a starter kit, which includes essentials like a UV/LED lamp, base gel, color gels, top gel, and various tools, this is generally a one-time or infrequent expense. Gel nail kits, such as those offered by Cirila, can range from ¥12,680 for a kit with one color to ¥14,980 for a kit with three colors (cirila.jp). After the initial kit, your only ongoing costs are for new color gels, which can be quite affordable, especially with options from 100-yen stores like Seria, CanDo, and Daiso that offer numerous colors (i-voce.jp). Over time, the cost per manicure becomes significantly lower than salon prices.
Affordable Product Availability:
The accessibility of affordable gel nail products, particularly in Japan, further enhances the cost-effectiveness of self-gel nails. 100-yen shops are a popular source for many basic items and a wide array of color gels. For instance, Seria offered 77 colors in 2022, CanDo had 63 colors in 2023, and Daiso featured 41 colors in 2023 (i-voce.jp). This allows beginners to experiment with various shades and designs without a large financial commitment.
Considerable Time Savings and Flexibility
Beyond monetary savings, self-gel nails offer a significant advantage in terms of time and convenience.
Reduced Appointment Time:
Salon appointments for gel nails typically require 2-3 hours per visit (watts-online.jp). This doesn't even account for travel time to and from the salon or the time spent booking appointments. With self-gel nails, you eliminate all of this.
Flexibility and Convenience:
One of the biggest time-saving aspects is the flexibility to do your nails whenever and wherever it suits you. You can apply or change your gel nails at your own pace, fitting it into your schedule without the need to adhere to salon operating hours or battle for popular appointment slots. This freedom allows you to maintain beautiful nails without disrupting your daily routine. "If you practice proper preparation and application techniques, you can achieve salon-quality longevity with self-gel nails," said MAINEE, Salon Owner and YouTuber (translated from Japanese, i-voce.jp). This means you can achieve professional results on your own time.
Quick Curing Time:
Gel polish hardens quickly under a UV/LED light, typically within 15-30 seconds per layer (cin-cia.com). This rapid curing means you don't have to wait for your nails to air dry for extended periods, unlike traditional nail polish which can take 15-30 minutes per layer and half a day to fully cure (cin-cia.com). The total application time for self-gel nails, including prep and painting, might be around 60-90 minutes, with prep and care taking about 30 minutes (cin-cia.com). While this is an investment of time, it's done on your terms.
Long-Lasting Results:
Gel nails last significantly longer than traditional polish—typically 3-4 weeks (cin-cia.com). This means you don't need to redo your manicure as frequently, further saving you time in the long run. The durability of gel nails ensures your efforts last, providing consistent beauty without constant touch-ups.
In summary, self-gel nails offer a compelling alternative to salon visits by providing substantial financial savings of over 100,000 yen annually and unparalleled time flexibility. With the right tools and techniques, anyone can achieve beautiful, long-lasting gel manicures from the comfort of their home, making it a highly cost-effective and convenient beauty solution.
How to Get Started with Self-Gel Nails: A Step-by-Step Guide
Starting with self-gel nails can seem daunting due to the array of tools and steps involved, but with the right guidance, it's an achievable and rewarding process. The entire procedure can be broken down into manageable stages: preparation and nail care, gel application, curing, and finishing touches. By following a structured approach, beginners can achieve beautiful, long-lasting results. Self Gel Nail Basic Method provides a good overview of the necessary steps.
Step 1: Preparation and Nail Care (Pre-treatment)
This foundational stage, known as "pre-treatment" or "prep," is crucial for ensuring proper gel adhesion and preventing lifting. It typically takes about 30 minutes (cin-cia.com).
Disinfect Fingers and Nails:
Begin by sanitizing your hands and nails. Use a lint-free wipe soaked in rubbing alcohol or a specialized nail prep solution. This removes any surface oils, moisture, and dust, creating a clean canvas for the gel. A clean nail surface is ideal for gel adhesion (cin-cia.com).
Shape the Nails:
Use an emery board to gently shape your nails to your desired length and form. Smooth out any rough edges. For beginners, choosing a fine-grit file helps prevent over-filing (cin-cia.com).
Push Back and Trim Cuticles:
Soak your fingers in warm water (or use cuticle remover) to soften the cuticles. Then, use a cuticle pusher or a wooden stick wrapped in cotton to gently push back the cuticles from the nail plate. Carefully trim any excess dead skin with cuticle nippers, being careful not to cut living skin. This step creates a clean boundary for the gel and prevents lifting.
Gently Buff the Nail Surface:
Using a sponge buffer with a fine grit, lightly buff the entire surface of each nail. This creates a slightly rough texture, which helps the base gel adhere better. Avoid over-buffing, as this can thin and damage the natural nail. The goal is to remove the natural shine, not to aggressively file the nail.
Remove Dust:
After buffing, use a dust brush or a clean, dry lint-free wipe to thoroughly remove all nail dust. Any remaining dust can cause bumps in the gel or prevent proper adhesion.
Step 2: Gel Application and Curing
This is where the magic happens, typically taking 60-90 minutes (cin-cia.com). Each layer of gel must be cured under a UV/LED light. Gel polish hardens in 15-30 seconds under a UV/LED light, with full curing in 30-60 seconds (cin-cia.com).
Apply Base Gel:
Apply a thin, even layer of base gel to each nail. Ensure you don't touch the cuticles or sidewalls of the nail. "Floating" the brush slightly above the nail surface can help achieve an even application. Cap the free edge of the nail to seal it.
- Cure: Place your hand under the UV/LED lamp and cure for the time recommended by your base gel's manufacturer (usually 30-60 seconds). The nail surface will likely remain sticky; this "tacky layer" is normal and helps the next gel layer adhere.
Apply Color Gel:
Apply a thin, even layer of your chosen color gel. Again, avoid touching the cuticles and sidewalls. Two thin coats are usually better than one thick coat for even color and proper curing.
- Cure: Cure each layer of color gel under the UV/LED lamp for the recommended time (typically 30-60 seconds per coat). Repeat for additional coats until you achieve your desired opacity.
Apply Top Gel:
Once your color layers are cured, apply a thin, even layer of top gel. This layer provides shine, durability, and protects your design. Ensure you cap the free edge for maximum longevity.
- Cure: Cure the top gel under the UV/LED lamp for the recommended time (often 60 seconds or longer for a strong finish).
Step 3: Finishing Touches
After the final cure, your nails are almost complete.
Remove Uncured Gel Layer (if necessary):
If you used a "wipe-needed" top gel, there will be a sticky, uncured layer on the surface. Soak a lint-free wipe in gel cleanser or rubbing alcohol and firmly wipe each nail until the sticky residue is gone and a high shine appears. If you used a "non-wipe" top gel, this step is not needed.
Hydrate Cuticles:
Finish by applying cuticle oil around your nails and gently massaging it in. This rehydrates the skin and cuticles, which can become dry from the acetone during prep and the curing process.
By diligently following these steps, even beginners can achieve beautiful and long-lasting self-gel manicures, enjoying the benefits of durable, salon-quality nails that last 3-4 weeks (watts-online.jp).
Frequently Asked Questions
How long do Japanese gel polishes typically last on nails?
Japanese gel polishes are known for their impressive durability. They typically last for 3 to 4 weeks on the nails without chipping or peeling (cin-cia.com). This is a significant improvement over traditional nail polish, which usually only lasts for 3-7 days and often chips within 2-3 days (watts-online.jp). The longevity of gel polish is one of its main advantages, allowing for extended wear of intricate designs.
Can I use regular nail polish remover to remove gel polish?
No, you cannot use regular nail polish remover to remove gel polish. Gel polish hardens through a chemical reaction under UV/LED light and requires a specific removal process. This usually involves soaking the nails in a specialized acetone-based remover for 10-15 minutes (watts-online.jp). Attempting to chip or peel off gel polish can severely damage your natural nails.
What is the average cost of a self-gel nail kit in Japan?
The average cost of a self-gel nail kit in Japan can vary, but starter kits are available at different price points. For example, Cirila offers kits ranging from ¥12,680 for a kit with one color to ¥14,980 for a kit with three colors (cirila.jp). Additionally, many individual items, including a wide array of color gels, can be purchased affordably at 100-yen stores, with brands like Seria offering 77 colors in 2022 and Daiso offering 41 colors in 2023 (i-voce.jp).
Is it possible to do intricate nail art with self-gel nail products?
Yes, it is absolutely possible to do intricate nail art with self-gel nail products. Gel polish's ability to harden instantly under a UV/LED light (in 15-30 seconds per layer) allows for detailed layering and precise designs without the risk of smudging (cin-cia.com). While bottle-type gels are good for simple applications, container-type gels paired with fine-tipped art brushes are recommended for more complex designs, offering greater control (cin-cia.com).
What is the difference between UV and LED nail lamps for curing gel polish?
Both UV and LED nail lamps are used to cure gel polish, but they use different light wavelengths and have different curing times. UV lamps use a broader spectrum of UV light, typically curing gels in 1-2 minutes. LED lamps use a narrower spectrum of LED light, which cures compatible gels much faster, usually in 30-60 seconds (cin-cia.com). Many modern beginner-friendly lamps are hybrid UV/LED, meaning they can cure both types of gel polish efficiently (cin-cia.com).
Sources
- 【初心者向け】セルフジェルネイルの基本の方法 ~必要なものから準備・塗り方まで~ | ララマル
- ジェルネイルのやり方・手順と必要なものを解説【初心者セルフ向け】 東京新宿のネイルスクール|「ネイルスクール シンシア」【JNA本部認定校】
- ジェルネイルのやり方完全版|知っておけば安心の手順とコツ・失敗時の対処法
- 初心者向け!【セルフジェルネイル】の基本のやり方。下準備から塗り方まで!【ネイリスト監修】
- 【楽天市場】■ジェル >ネイルキット:プチプラ
- 爪も肌も傷つけない次世代ジェルネイルキット |cirila(シリラ)公式
- セルフジェルネイルを始めてみたいです。できるだけコスパのいいスターターセットが買いたいです。おすすめ知ってる方教えてください。... - Yahoo!知恵袋
- 【2026年最新】ネイリストが教えるジェルネイルキットの選び方/タイプ別おすすめ人気ランキングもご紹介 - Unknown Beauty Place(アンノウン・ビューティ・プレイス)
Related Reading
- How to Do Japanese Mirror Nails: The Complete Guide
- How to Remove Japanese Gel Nails at Home
- How to Do Japanese Gel Nails at Home: Complete Beginner Guide
- How to Prevent Gel Nail Lifting: Japanese Pro Tips
- Best Japanese Burgundy and Maroon Gel Polishes
— The Nail Atlas Team